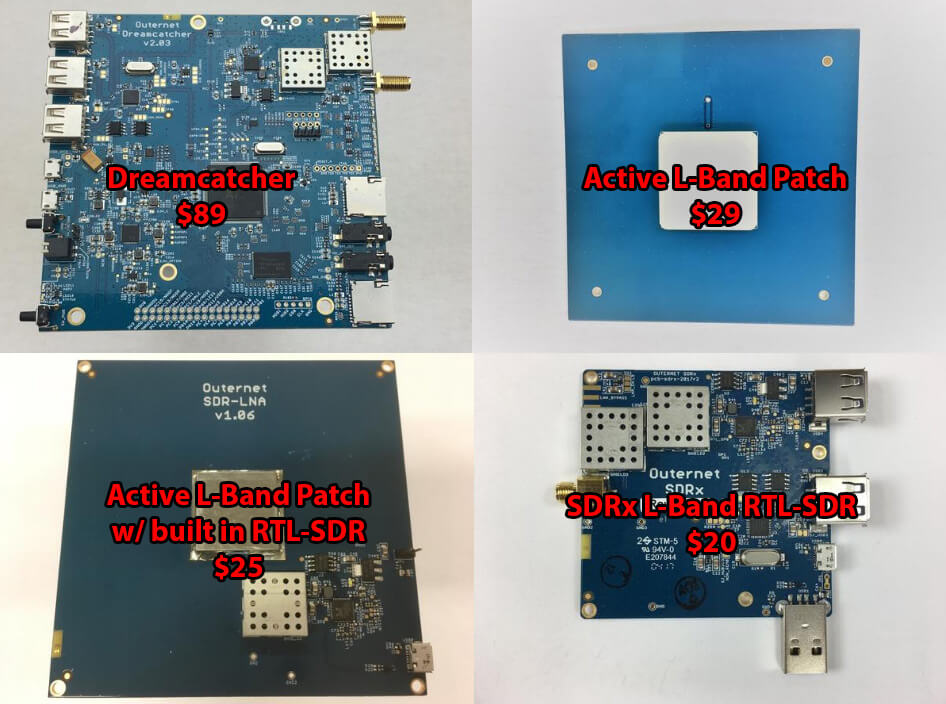
Back in June we tested Outernet’s new Dreamcatcher which is an ARM based computing board with RTL-SDR and L-band LNA built in. The $99 USD kit also included an external active L-band patch antenna. The Dreamcatcher full kit has now been reduced to $89 USD, and the active L-band patch antenna can also now be purchased by itself for $29 USD. The active patch antenna is also compatible with the bias tee on our V3 dongles and is a good low cost option for exploring most L-band satellite signals like Outernet, Inmarsat STD-C and AERO around 1542 MHz. The filter does unfortunately cut off the higher Iridium frequencies though.
They are also selling off their older L-band SDRx RTL-SDR boards at a reduced price of $20 USD. The SDRx is a RTL-SDR PCB with a built in L-band LNA and filter, but unlike the Dreamcatcher does not have built in computing hardware. They also have a limited $25 USD edition version of their active patch antenna which includes a built in RTL-SDR. This version is a bit more noisy compared to the standard active patch, but may be an interesting experimental antenna for some.
FSQ (Fast Simple QSO) is a relatively new ham band mode for making text QSO’s (contact or exchange of information with another ham) over HF frequencies. It is a low data rate mode similar to PSK31 but with some interesting features like relaying which allows signals to be relayed further via other FSQ stations.
Over at in Melbourne, Australia a Cyberspectrum SDR meetup is held every few weeks. At this weeks meetup @faulteh discusses the FSQ mode and some of it’s interesting features. He also shows how he can transmit FSQ using a Si5351 clock generator and Arduino (with filtering). In the future he hopes to also create a fully automated receive station using a Raspberry Pi and RTL-SDR dongle.
UPDATE: Version 2 of RPiTX renders this tutorial obsolete, as it is now very easy to copy and replay signals using the RPiTX GUI (or the "sendiq" command) and an RTL-SDR. This tutorial is still valid for the overall concept.
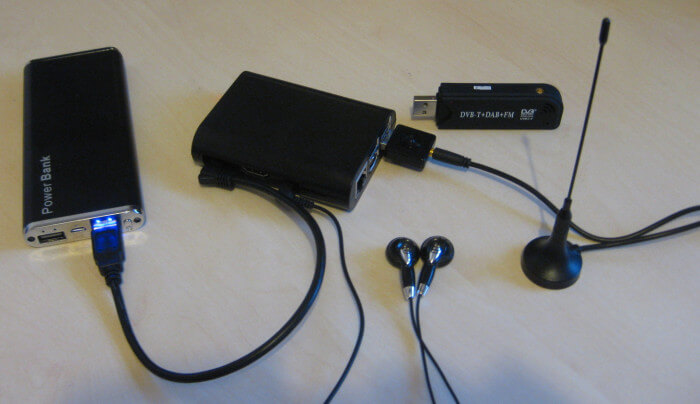
With an RTL-SDR dongle, Raspberry Pi, piece of wire and literally no other hardware it is possible to perform replay attacks on simple digital signals like those used in 433 MHz ISM band devices. This can be used for example to control wireless home automation devices like alarms and switches.
In this tutorial we will show you how to perform a simple capture and replay using an RTL-SDR and RPiTX. With this method there is no need to analyze the signal, extract the data and replay using a 433 MHz transmitter. RPiTX can replay the recorded signal directly without further reverse engineering just like if you were using a TX capable SDR like a HackRF to record and TX an IQ file.
Note that we've only tested this replay attack with simple OOK 433 MHz devices. Devices with more complex modulation schemes may not work with this method. But the vast majority of 433 MHz ISM band devices are using simple modulation schemes that will work. Also replay attacks will not work on things like car keys, and most garage door openers as those have rolling code security.
A video demo is shown below:
Replay Attacks at 433 MHz with RTL-SDR and a Raspberry Pi running RPiTX
Hardware used and wireless ISM band devices tested with RPiTX
RpiTX
RPiTX is open source software which allows you to turn your Raspberry Pi into a general purpose transmitter for any frequency between 5 kHz to 500 MHz. It works by using square waves to modulate a signal on the GPIO pins of the Pi. If controlled in just the right way, FM/AM/SSB or other modulations can be created. By attaching a simple wire antenna to the GPIO pin these signals become RF signals transmitted into the air.
Of course this creates an extremely noisy output which has a significant number of harmonics. So to be legal and safe you must always use bandpass filtering. Harmonics could interfere with important life critical systems (e.g. police/EMS radio, aircraft transponders etc).
For testing, a short wire antenna shouldn't radiate much further than a few meters past the room you're in, so in this case you should be fine without a filter. But if you ever connect up to an outdoor antenna or amplify the signal then you absolutely must use adequate filtering, or you could find yourself in huge trouble with the law. Currently there are no commercially made 433 MHz filters for RPiTX available that we know of, so you would need to make your own. Also remember that you are still only allowed to transmit in bands that you are licensed to which for most people will be the ISM bands.
Over on his YouTube channel GusGorman402 has uploaded a video tutorial showing how to take an old internet router and install OpenWRT and the RTL-SDR drivers on it. OpenWRT is a third party Linux based router firmware which can greatly expand the usefulness of a standard router. As it is Linux based it is possible to install the RTL-SDR Linux drivers on the router and use the router as a cheap RTL-SDR streaming or decoding platform.
Gus’s tutorial takes us from the beginning where he first shows how to install OpenWRT firmware over the stock firmware on the router and how to configure the settings. He then shows how to install the RTL-SDR drivers and run software like rtl_tcp and dump1090 with opkg and luci.
Installing OpenWrt and RTL-SDR libs on used router
NooElec have just released their new NESDR Nano 3 RTL-SDR dongle for $27.95 USD. This is a new iteration in their line of ‘nano’ sized dongles, which are very small and suitable for use on small devices like Raspberry Pi’s and mobile phones. These nano form factor RTL-SDR dongles are also commonly used with the Stratux project which aims to bring lost cost ADS-B and UAT capabilities to small airplane pilots.
The Nano 3 appears to have a standard nano sized RTL-SDR PCB with TCXO inside, but comes with a new fully enclosed metal case with internal thermal coupling pads for cooling. A small external heatsink is also provided for optional use with the dongle. The dongle also uses a standard MCX connector, but the kit comes with an MCX to SMA F adapter. We’re not sure if the cooling from the small metal case will be enough to solve the L-band PLL lock problem, but perhaps when combined with the modified L-band driver tweak it might be enough. Failing that the external heatsink combined with slight airflow from a fan should be enough.
The NESDR Nano 3 small form factor RTL-SDR
The previous model called the Nano 2, was also redesigned from the generic nano models for better cooling and to be able to use a TCXO. However, some tests by Chris of the Stratux project seem to show that the Nano 2 is quite a bit noisier than the cheaper generic nano dongles, and actually runs about 40 degrees F hotter. Noise is a problem with these small dongles as the noisy digital and switch mode sections are much closer to the RF sensitive parts. Heat is also an issue due to the lack of PCB space for heat dissipation. Hopefully the Nano 3 resolves these issues with the metal case and improved cooling.
There are now several generations and models of these ‘nano’ RTL-SDRs available. All briefly described below:
Two dongles for $40 USD with antennas, or two for $35 USD without antennas. We also wholesaled a few from them and sell them on our store for intl. buyers @ 16.95 USD each incl. shipping.
Redesigned for low power usage and less noise. Uses a switch mode power supply for less power wastage, but designed to be unaffected by any additional switch mode noise. Runs about 60 degrees F cooler than the Nano 2 and 16F cooler than the generic. Does not have an enclosure so is a bit more fragile. Also does not have a TCXO.
Good choice for Stratux or similar projects might struggle with the power requirements of multiple dongles on a Pi3. Doesn’t have a TCXO so mainly useful for frequency insensitive applications like ADS-B.
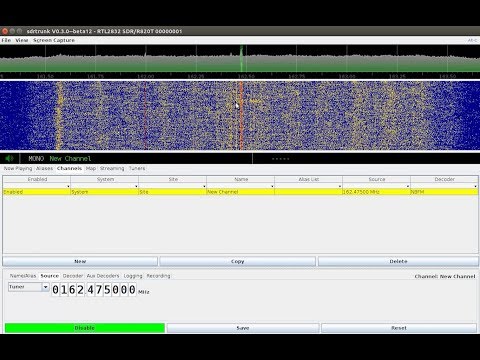
SDRTrunk is a cross platform Java based piece of software that can be used for following trunked radio conversations. In addition to trunk tracking it also has a built in P25 Phase 1 decoder. Compared to Unitrunker SDRTrunk is an all-in-one package, and currently it supports most trunking system control channels, but unlike Unitrunker it still misses out on some systems EDACS and DMR.
Over on his YouTube channel AVT Marketing has uploaded an excellent 6-part video series that shows how to install SDRTrunk and the Java runtime environment on Ubuntu Linux. The sections covered include, installing Java, setting the Java environment variables, installing other SDRTrunk prerequisites such as Apache Ant and the JMBE audio codec for decoding P25, and finally actually using and setting up SDRTrunk. Like all of AVT’s other videos, this is an excellent tutorial that takes you through the entire process from the very beginning so is useful for beginners as well.
Installing SDRTrunk & Java JRE on Ubuntu Linux
If you’re new to trunking: Trunking systems are typically used with handheld radio systems (e.g. those that police, security guards, workmen etc carry around). The basic idea is that each radio constantly listens to a digital control channel which tells it what frequency to switch to if a call is being made. This allows the frequency spectrum to be shared, instead of designating one fixed frequency per user which would be very inefficient. But this system makes it difficult for scanner radios to listen in to, because the voice frequency could change at any time. Therefore software like Unitrunker and SDRTrunk which can decode the control channel is required. In addition many new systems use digital audio like P25 or DMR which requires digital decoders like SDRTrunk or DSDPlus.
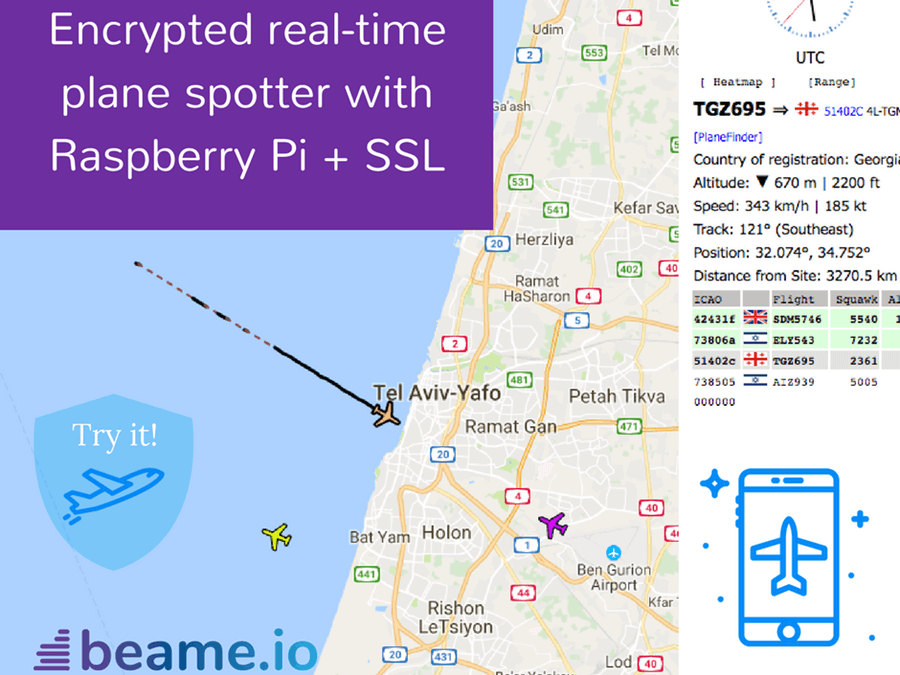
These days it’s quite easy to share your ADS-B reception on the internet with giant worldwide aggregation sites like flightaware.com and flightradar24.com. These sites aggregate received ADS-B plane location data received by RTL-SDR users from all around the world and display it all together on a web based map.
However, what if you don’t want to share your data on these sites but still want to share it over the internet with friends or others without directly revealing your IP address? Some of the team at beame.io have uploaded a post that shows how to use their beame.io service to securely share your ADS-B reception over the internet. Beame.io appears to be a service that can be used to expose local network applications to the internet via secure HTTPS tunneling. Essentially this can allow someone to connect to a service on your PC (e.g. ADS-B mapping), without you revealing your public IP address and therefore exposing your PC to hacking.
On their post they show how to set up the RTL-SDR compatible dump1090 ADS-B decoder on a Raspberry Pi, and then connect it to their beame-instal-ssl service.
Encrypted ADS-B Sharing with the beame.io service.
It’s been known for a while now that it is possible to break into cars using simple wireless attacks that involve jamming of the car keyfob frequency. Sammy Kamkars “rolljam” is one such example that can be built with a cheap Arduino and RF transceiver chip. One way to secure yourself against wireless attacks like this is to run a jammer detector.
A jammer detector is quite simple in theory – just continuously measure the signal strength at the car keyfob frequency and notify the user if a strong continuous signal is detected. Over on his blog author mikeh69 has posted about his work in creating a wireless jammer detector out of a Raspberry Pi and RTL-SDR dongle. He uses a Python script and some C code that he developed to create a tool that displays the signal strength on an onscreen bar graph and also conveys signal strength information via audio tones. He writes that with a pair of earphones and battery pack you can use the system while walking around searching for the source of a jammer.
Mikeh69’s post goes into further detail about installing the software and required dependencies. He also writes that in the future he wants to experiment with creating large area surveys by logging signal strength data against GPS locations to generate a heatmap. If you are interested in that idea, then it is similar to Tim Haven’s driveby noise detector system which also used RTL-SDR dongles, or the heatmap feature in RTLSDR Scanner.