The old audio waterfall plugin for SDR# seems to be no longer available for download anywhere (it may have gone out of date and is no longer compatible with the latest versions of SDR#). Alan Duffy decided to write his own version of the audio waterfall plugin and make it available for download. An audio waterfall shows the demodulated audio in waterfall form, essentially creating an audio spectrum analyzer. This can be useful for understanding the demodulated frequency structure of a signal.
To install the plugin simply download the dll from his website and place it in the SDR# folder. Then open plugins.xml file with a text editor, and add the magicline specified on his page. Note that for us Chrome detected this file as malicious, but this is a false alarm as Chrome does this often with unknown .dll files. To recover the file we had to go to the Chrome menu -> Downloads, then select "Recover File" to download the file. (If you still have problems with the download then check out the comments as some users have kindly mirrored it). (File was moved to a trusted site so this problem shouldn't occur anymore)
Alan's Audio waterfall shown together with the built in audio spectrum analyzer in SDR#.
Recently we found this excellent quick start guide by Kenn Ranous which shows how to set up various RTL-SDR related software programs on (Debian) Linux. The guide shows how to install the drivers, how to install and set up GQRX, CubicSDR, dump1090, Virtual Radar Server, QSpectrum Analyzer and SDR Trunk.
If you are struggling with getting an RTL-SDR to work on a Linux system then this should be a very good starting point.
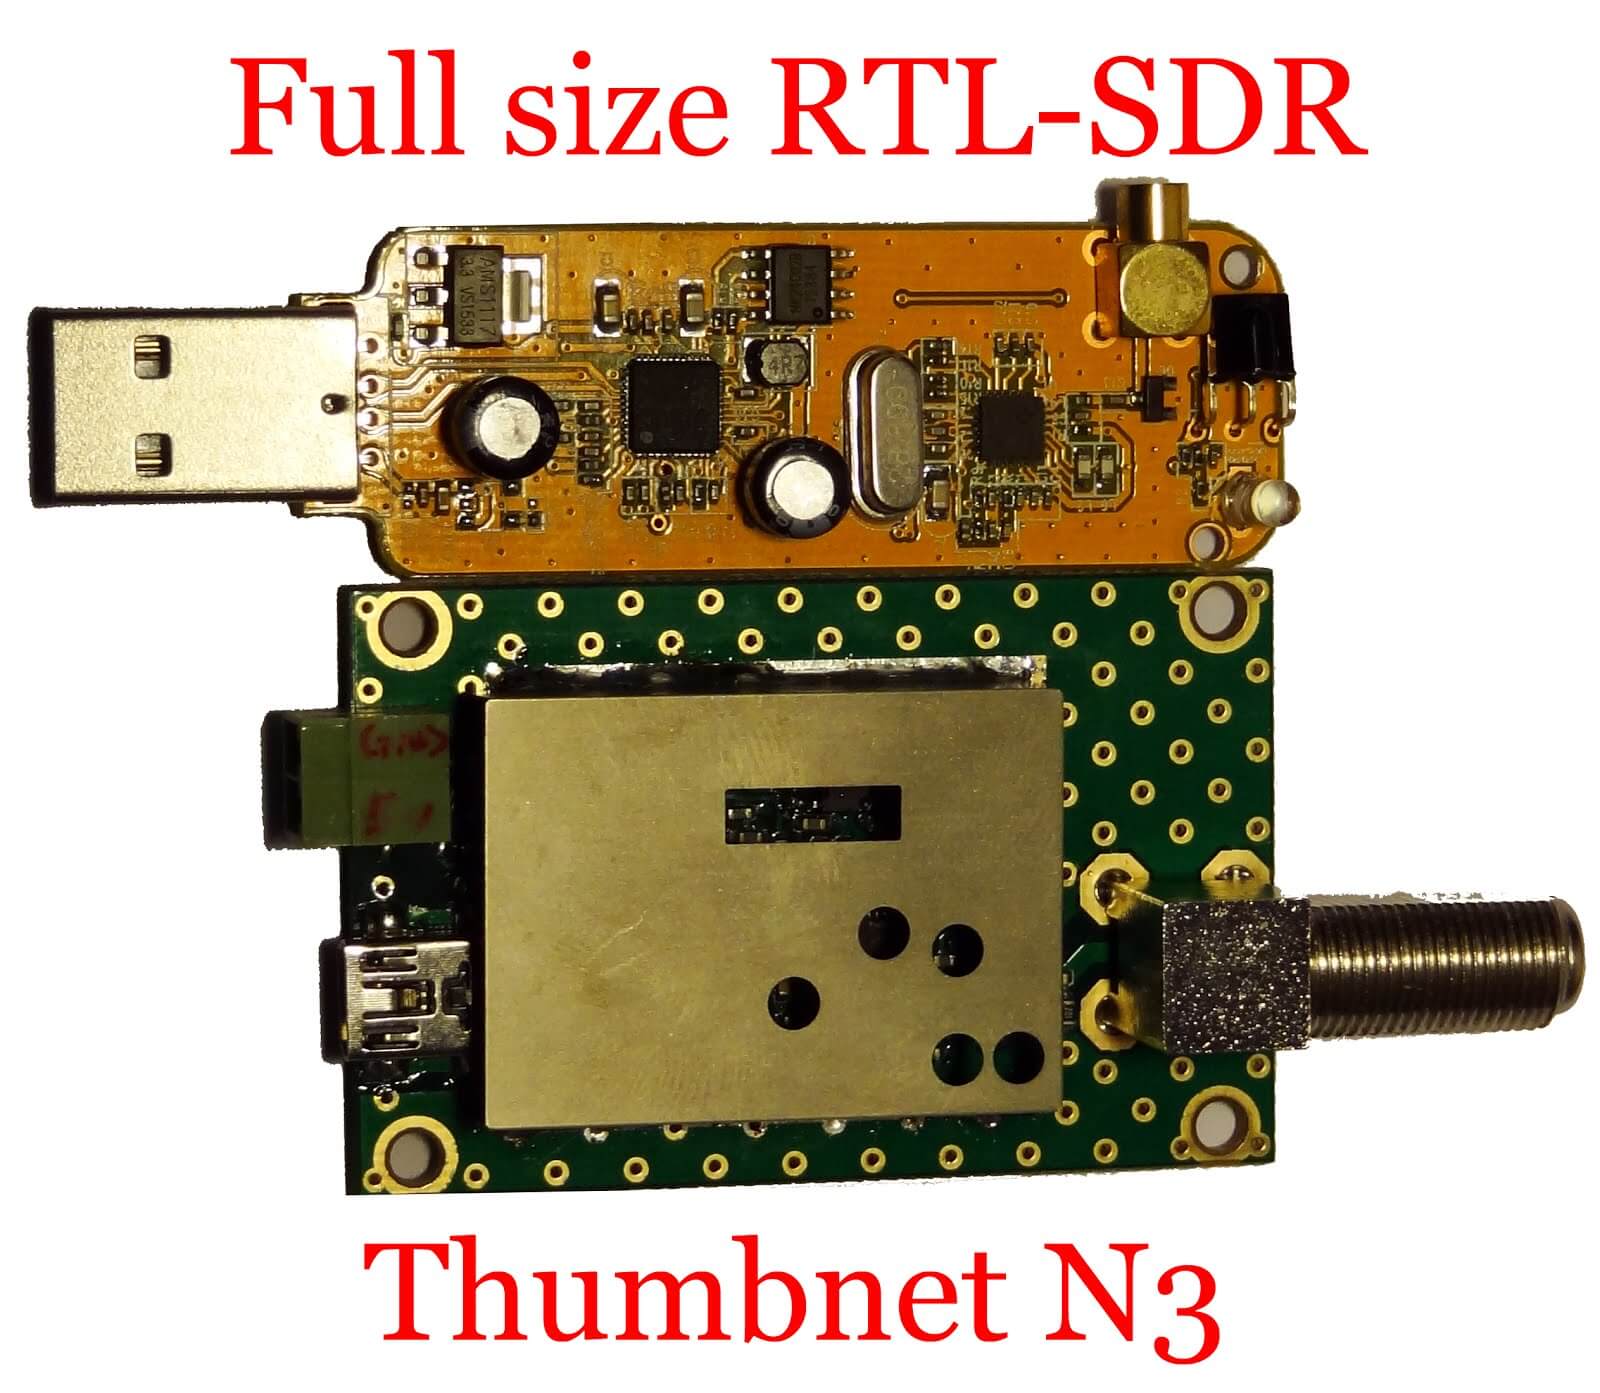
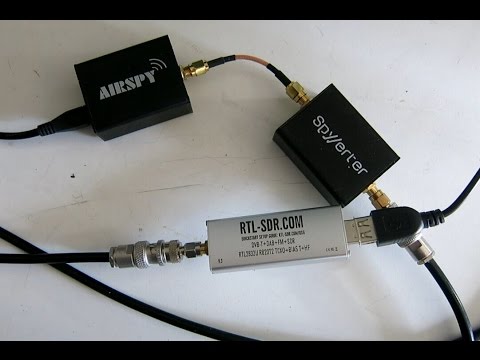
A few weeks ago we posted about ThumbNets announcement of their new N3 RTL-SDR dongles. The main theme of their new dongles is lower noise as can be seen by their decision to disable the on board switch mode power supply and add an external power port for powering the dongle from a clean power supply.
Akos from the RTLSDR4Everyone blog received a prototype sample of the N3 for an initial review. In his review he shows some close up shots of the N3 PCB, and does a quick test on receiving some signals. His screenshots show that the noise floor is indeed very low, and that many noisy spurs are eliminated or at least significantly reduced.
Once ThumbNet release their actual commercial units we intend to produce our own review as well.
ThumbSat is a company hoping to enable experimenters to get low cost mini satellites into orbit for about $20k. To support the need for global RX of these satellites they have the ThumbNet project which utilizes RTL-SDR dongles as the receiver. They aim to provide schools and eligible volunteers around the world with free RX hardware to receive and record the data coming from these satellites.
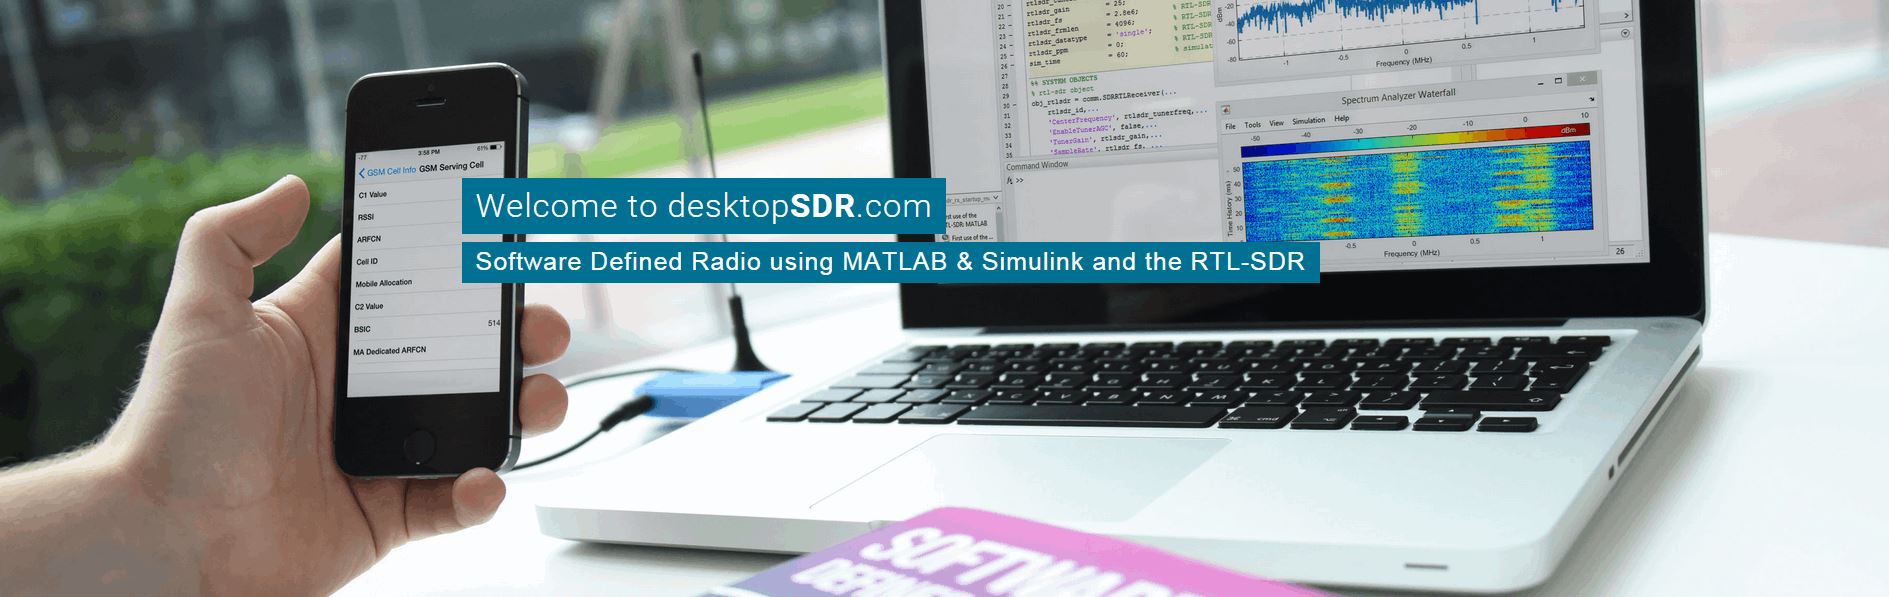
The University of California, Los Angeles is hosting a 3-day hands on short course on using SDR’s like the RTL-SDR with FPGA hardware and MATLAB Simulink. This is a course with a high knowledge pre-requisite, so you will likely need qualifications and/or knowledge equivalent to a bachelors in Electrical/Computer Engineering to be able to understand the material. It is mainly intended for DSP and Communications Engineers, HDL designers, FPGAs engineers, RF engineers, and systems engineers. The course runs for 3 days between 10 – 12 October. The main blurb of the course is described below:
One of the main aims of this course is to demonstrate the workflow required to take floating point Simulink receivers (such as the ones presented in the book) and target them onto SDR hardware. This means converting to fixed point, generating HDL code, and then packaging it into something that can be deployed to ZynqSDR hardware.
In this short course we will present, review, simulate then implement real-time DSP enabled software defined radios (SDR) on laptops, Raspberry Pis, Xilinx (Zynq) SoC FPGAs with RF transceivers. The design, simulation and implementation will take the form of a complete model based design work-flow from within MathWork’s MATLAB and Simulink software tools. The course will ensure attendees are educated in key relevant multi-rate DSP algorithms and techniques, in communications modulation methods, quadrature/QAM transceiver designs, and timing and synchronisation. The first part of the course will educate on DSP and communications, followed by a second part on FPGA systems implementation (focussing on Xilinx Zynq SoC) and introduce MathWorks Embedded and HDL Coder methods for hardware targeting. In the third and final part of the course we will develop real-time ‘desktop’ implementations of SDR transceivers using a model based design flow. We will start with floating point designs, which will evolve to fixed point, and then undergo final code generation stages with the Embedded and HDL Coder packages prior to FPGA deployment..
All attendees on the course will use (and take home!) an RTL-SDR device (which tunes from 25MHz to 1.75GHz) and have access to a Raspberry Pi and Zynq SDR kits in class hosting the RTL-SDR device and a wideband FMComms RF card respectively. The class format will be 40% lecture, 20% live SDR demonstration and 40% hands-on ‘desptop SDR’ using software and SDR hardware.
Earlier in the month we posted about the “Unallocated Space” free four week class on signal analysis taking place in the Baltimore-DC area. The course has now started and they are live streaming the lectures and saving them on YouTube. The first two classes have already passed, and two videos are uploaded.
The first class went over installing the RTL-SDR as well as showing a few examples of decoding some signals. The second class covers various modulation types and digital encoding schemes. They show how to learn how to identify various digital signals by listening to them and viewing them on the waterfall. The class slides are also available on links placed in the video description.
The third and fourth classes have not yet streamed. The third class will be live streamed on October 4, 7PM local time. Visit their YouTube channel for the videos.
Recently we sent document author “D. B. Gain” a sample RTL-SDR V3, so that he could write a review and guide on it. The guide is now available at http://www.udxf.nl/ute-info.html, and the link to the guide is labelled “The RTL-SDR V3” and is under the “HOW TO …” section. The guide reviews the V3 and tests it out on reception of HF signals. He uses an off center fed dipole up around 30ft, RG6 cable TV coax feedlink and a Barker and Williamson 30 MHz low pass filter. He write this valuable piece of advice:
The larger the antenna system, the greater the gain – usually. It doesn’t take too much RF to overload the V3 dongle, so a 20ft piece of wire will do better than say a 430ft wire loop atop some phone poles. Use an attenuator if you have one. Remember the issue with AMBC swamping where AM stations pop up in various parts of the HF spectrum and use a preselector and/or attenuator if you can. Shortwave broadcast stations can also create spurs in the V3. Some radio parts houses carry a variable attenuator meant for cable TV or VCR player use that can be employed at HF with the use of some F to UHF or whatever connector your antenna system employs adaptor, this can be installed in the antenna system and adjusted to result in least usable signal getting to the V3, which assures best dynamic range. Then one would adjust the FFT Spectrum gain in your SDR control app of choice to best level on a quiet band, say 14MHz. This will ensure you don’t have to mess with adjusting the gain on lower frequency bands just to keep the band noise baseline above the bottom of the FFT window.
The RTL-SDR V3 receiving ham radio signals on 40m.
Mikael Dagman (SA6BSS) also wrote in to let us know about how he’s been using the V3 to receive WSPR. He writes:
For an experiment I have set up a SDR play and a RTL blog v3 dongle fed from the same antenna (butternut hf9) through an antenna splitter, grabbing Qrss signals on 40m, on the v3 I added a bpf. The v3 is run from SDR sharp q-branch RTL AGC on and both radios feeding separete instances of spectrum labs, doing wspr as the same time on both radios, there I hardly any difference, maby one spot out of ten the rsp get 1 db more in sn . Without the filter on the v3 its completely falling apart but with the filter inline I am more then impressed!!
I will stay on 40m for a couple of days trying to catch a ZL station tx:ing with 1.1W Qrss with the v3, (that’s 16000 km away) I will then qsy to 30m with the v3 where there is more signals to look at.
Spectrum available here http://www.qsl.net/sa6bss/ You see that bottom spectrum have the name RTL upper left corner.
Over on YouTube Leif (SM5BSZ) has also uploaded a video where he compares the performance of the RTL-SDR V3 with the Airspy+SpyVerter. Of course the V3 cannot compete with the higher end Airspy, but still performs decently enough for a beginner. If you are strapped for time, the results are concluded at about 28 minutes.
Back in September we posted a tutorial that showed how to set up an Outernet receiver with a Raspberry Pi running their rxOS software and an RTL-SDR, LNA and patch antenna. Recently, Outernet have released a new decoder for Windows and Linux which is very easy to install and run. Outernet is an L-band satellite data service which can be received almost anywhere in the world with an RTL-SDR. They aim to be a “library in the sky”, constantly broadcasting public data like news, books, images/videos and other data files.
The new decoder is a Linux machine that runs in a self contained multiplatform Virtual Box virtual machine. This means that it is a standalone package, and it comes included with the OS, decoder, and all the files needed to make it run. Using a virtual machine eliminates any installation issues due to missing dependencies or libraries. Running the VM in Windows is as easy as double clicking on a .exe file to open it up. Note that you’ll need a relatively modern machine that supports hardware virtualization support (VT-x) (Core 2 or newer). The virtual machine itself is lightweight, and uses less than 50MB of RAM, and has very low CPU usage.
At the moment, the decoder writes files downloaded from the Outernet service to a directory stored in C:\Outernet\downloads. Unlike the Raspberry Pi decoder, there is no web interface for accessing the content, though this will probably be added in future builds. The files can be directly accessed in the Windows/Linux file managers.
To set up the VM on a Windows machine:
Download the Windows .exe archive and open it. When prompted, extract the files to a convenient folder on your PC.
Plug in your RTL-SDR and LNA, and set up your L-band antenna.
In the extracted folder run the outernet.exe file once. This will open the decoder and the first time it is run it will automatically create a folder in C:\Outernet.
If you are in the Europe/Africa and use the Alphasat satellite then you can ignore this step. If you are in another region, close the opened VM, then go to C:\Outernet\Satellites.Available, and then copy the file corresponding to the satellite used in your part of the world over to C:\Outernet\Satellites.Selected. Now reopen the outernet.exe VM.
The decoder should now be showing a good SNR value >2 in the top right information, and the State: should show FRAME LK. The bottom right window should also scroll “Packed written to socket.”
After a few minutes check the C:\Outernet\cache folder for pieces of files. Later check the C:\Outernet\downloads folder for completed files.
Further instructions can be found on their Windows Readme file. Note that as there is no web browser for the files, some will be downloaded as GZipped files, and will need to be unzipped to be viewed. For more information on the Outernet service as well as the hardware requirements see our previous tutorial.
We tested out the VM on a Windows laptop for a few hours and was able to receive several GZipped Wikipedia webpages as well as a photo, as shown in the screenshot below.
Files downloaded from Outernet (left). Outernet decoder running in VM (right).
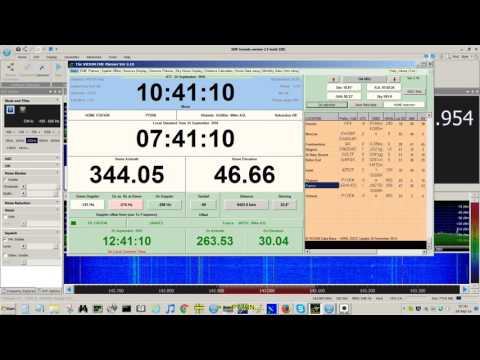
Moon Bounce or “Earth Moon Earth” (EME) is an amateur radio activity where people attempt to transmit a signal towards to the moon, and listen to the reflected signal. In some cases a separate transmitter is not needed, as an already powerful constant transmitter like the GRAVES radar in France can be used.
Over on his YouTube channel user cqpy2rn has uploaded a video showing his moon bounce reception of the GRAVES radar using an eleven element yagi antenna. He compares the reception with an RTL-SDR, FunCube PRO Plus and SDRplay. He writes:
+++ Nooelec model NESDR Smart (RTL-SDR) +++ GOODs: Price $20, frequency stability 0.5ppm tcxo, aluminum case, firm sma antenna connector, better dynamic range than regular-cheaper RTL dongles. Easy gain adjustment. BADs: No pass filters, freq coverage from 24MHz to 1.7GHz, poor dynamic range (moderate de-sense with near strong signals)
+++ FunCube PRO PLUS – FCDPP +++ GOODs: freq coverage from 150KHz to 2GHz, pass saw filters, frequency stable 0.5ppm tcxo, easy gain adjustment, acceptable dynamic range. BADs: Plastic case, fragile sma connector, just 192KHz wide spectrum view, price $160.
+++ SDRPlay +++ GOODs: Frequecy coverage from 10KHz to 2GHz, firm SMA connector, pass saw filters, up to 8MHz wide spectrum view, acceptable dynamic range. BADs: Plastic case, legacy printer USB connector, frequency drift during warm up, difficult gain adjustment
CONCLUSION: In essence all these have the same “DNA”, they were made from digital TV tuner chips, comparisons produce very similar RX practical results, the RTL suffers due the lack of internal filtering which can be a little remediated adjusting the gain carefully through your SDR software or adding external filters. FCDPP and SDRPlay are vey similar, although the freq drift for SDRPlay is a bit annoying to me.
Nooelec RTL vs. FunCube PRO Plus vs. SDRPlay (VHF 143MHz graves via EME test)