Category: SDRplay

SDRplay RSP1 Price Reduced to $99.95 USD

SDRPlay have just announced that their RSP1 unit has just been reduced in price to $99.95 USD. Their press release reads:

SDRplay are pleased to announce a price reduction for their entry-level SDR receiver, the RSP1 to $99.95 USD making it the most competitive mid-range SDR to include reception down to low frequencies without the need for an upconverter. The RSP1 provides general coverage receiver and panadapter capability from 10 kHz to 2 GHz. As well as providing SDRuno SDR software, support for popular 3rd party packages like HDSDR, SDR-Console and Cubic SDR is provided. Recent availability of an SD Card image makes for easy set up on a Raspberry Pi.

Over time we’ve seen the RSP1 reduce in price originally from $299 USD, to half price at $149 USD in March 2015 and then to $129 USD in September 2016, and now finally down to $99 USD. The newer RSP2 remains at a price of $169.95 USD.

The SDRplay RSP1
The SDRplay RSP1

Receiving Jupiter Noise Bursts with an SDRplay RSP1

Over on YouTube user MaskitolSAE has uploaded a video showing him receiving some noise bursts from Jupiter with his SDRplay RSP1. The planet Jupiter is known to emit bursts of noise via natural ‘radio lasers’ powered partly by the planets interaction with the electrically conductive gases emitted by Io, one of the the planets moons. When Jupiter is high in the sky and the Earth passes through one of these radio lasers the noise bursts can be received on Earth quite easily with an appropriate antenna 

In his video MaskitolSAE shows the 10 MHz of waterfall and audio from some Jupiter noise bursts received with his SDRplay RSP1 at 22119 kHz. According to the YouTube description, it appears that he is using the UTR-2 radio telescope which is a large Ukrainian radio telescope installation that consists of an array of 2040 dipoles. A professional radio telescope installation is not required to receive the Jupiter bursts (a backyard dipole tuned to ~20 MHz will work), but the professional radio telescope does get some really nice strong bursts as seen in the video.

Jupiter 2017.02.04 RSP 1 UTR-2

The UTR-2 Radio Telescope. Photo Attr. Oleksii Tovpyha (Link)

New Raspberry Pi image preloaded with software available for the SDRplay

Over on their forums the SDRplay team have just released a new Raspberry Pi image which comes preloaded with the drivers and a bunch of ready to use software. They write

We have released a Raspberry Pi 3 image that has a number of SDR applications pre-built and tested that support the RSP. Periodically, we will update the image with software updates and new software.

The current list of software included on the image is:

SoapySDR/SoapySDRPlay, SoapyRemote, ADS-B (dump1090), CubicSDR and SDR-J DAB receiver

Please note: This is a complete OS with software image. Writing the image to a micro SD card will wipe the micro SD card of any other data that is on there, so we recommend you make sure you have backed up any data on your existing micro SD card or you use a new micro SD card.

Instructions:

1. Download image. There are two downloads provided, the 7zip version is just a smaller download but not everyone has 7zip which is why we also provide a zip download. The links are here:

http://www.sdrplay.com/software/SDRplay_RPi3_V0.1.zip (2.7 GB)

http://www.sdrplay.com/software/SDRplay … 0.1.img.7z (2.0 GB)

2. Extract the contents of the compressed file. This will extract to a .img file which will be about 7.2 GB

3. Use an image writer such as Win32DiskImager (https://sourceforge.net/projects/win32diskimager) to put the image onto the micro SD card.
WARNING: Please make sure that you use the correct drive letter for the micro SD card. The image writing software will completely remove any data that is on the destination media.

That’s it – put the micro SD card into the Raspberry Pi 3 micro SD card slot and boot the system. Allow the system to fully boot and you will see a GUI that will allow you to run each of the applications or read further information.

We also recommend that you use an active cooling system on your Raspberry Pi 3 to avoid any issues with over heating. In our tests, we have used heatsinks and a fan in a case. The CPU speed will be throttled if the temperature gets too hot, so for optimum use this is really recommended. These cases are available at reasonable prices from many Raspberry Pi stores.

If you are a developer of software that supports the RSP and you would like to be included on the image that we will release periodically, please contact us at [email protected] – currently we’re aiming to update the image every quarter, this will largely depend on software availability and what the demand is.

We are aware of other software that we are looking to get onto the next release such as Pothos and more SDR-J software. We will work with developers on any issues we’ve seen during this process so that we can get them onto future images.

Best regards,

SDRplay Support

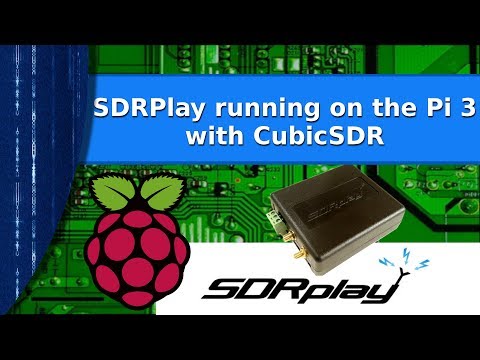
Last week we posted about Kevin Loughin’s video where he showed how to get CubicSDR and an SDRplay running on a Raspberry Pi 3. This new ready to go image saves you from needing to perform the install process.

Running an SDRplay RSP2 on a Raspberry Pi 3 with CubicSDR

Over on YouTube user Kevin Loughin has uploaded a video demonstrating his SDRplay RSP2 running on a Raspberry Pi 3. The software he uses is CubicSDR which is a multiplatform program that is similar to software like SDRUno, SDR#, SDR-Console, HDSDR etc. The video shows CubicSDR running, but the interface is quite slow and laggy, although the audio is at least not choppy.

In a previous post we showed one of Kevin’s earlier videos where he does a tutorial and some scripts that help to actually set up the SDRplay drivers and CubicSDR in Linux. In the new video he first goes over a specific hack that needs to be done in Raspbian to fix the PulseAudio server. Then he explains that you can run the Linux build script mentioned in his previous tutorial video and it should work on the Raspberry Pi 3 just fine. Finally he mentions that CubicSDR and the SDRplay use a high amount of CPU processing on the pi3 so some sort of cooling mechanism is required or the pi3 may throttle down its CPU.

Ham Radio - SDRPlay running with CubicSDR on a raspberry Pi 3

Video Tutorial on Setting up the SDRplay RSP2 in Linux

Over on YouTube user Kevin Loughin has recently uploaded a video that shows a step by step guide on how to set up an SDRplay RSP2 in Linux. Setting up the RSP2 in Linux is not a simple task, but Kevin’s video walks us through the entire process step by step. At the end of the process you’ll be set up with the SoapySDR framework which is the glue software that sits between the hardware driver and SDR software. You’ll also have the CubicSDR software installed which is what you use for general browsing and listening. CubicSDR is similar to SDRuno, SDR#, HDSDR etc.

Over on his blog he’s also posted the steps in text form, and uploaded some of the scripts that he’s created to simplify the install process.

Ham Radio - How to set up the SDRPlay RSP2 under Linux. (See description below)

Mike’s SDRuno Tutorial Series

Mike Ladd, one of the top volunteer contributors of the SDRplay community was recently hired by SDRplay officially and has now been working on a fairly comprehensive SDRuno tutorial series over on the SDRplay YouTube channel. SDRuno is the official software for the SDRplay line of SDRs and is a slightly modified version of the ‘Studio1’ software which was previously acquired by SDRplay. SDRuno also supports the RTL-SDR.

SDRuno is a complex piece of software with many features and settings, so it’s great to see a comprehensive video tutorial like this. Mike’s tutorial series currently has 10 episodes, and discusses things like the basic layout and settings of SDRuno, using Virtual Audio Cable (VAC), noise reduction, memories, calibration, DSD, notch filters and FM broadcast with RDS. More videos are probably still on the way.

SDRuno Basic layout and settings - obsolete (MV001)

Instructions and a Review of the SDRplay RSP1 Metal Enclosure Upgrade Kit

Mike (kd2kog), our partner on the SDRplay RSP1 Metal case upgrade kit has recently uploaded an instruction set that shows step by step how to perform the upgrade (pdf). It shows how to dismantle the RSP1 from the plastic case, install the included broadcast FM filter, mount the PCB and shows where all the nuts and washers go.

The metal case upgrade is something we brought out back in March. It allows owners of the SDRplay RSP1 SDR to upgrade the default plastic case to a sturdy metal one for improved ruggedness and RF shielding. It also comes with an included broadcast FM filter to help reduce strong FM images which are often a problem on some bands with the RSP1. It also comes with a handy travel case. If you want to purchase the enclosure we have it available on our store at www.rtl-sdr.com/store, and also on US Amazon, both with free shipping.

Also, over on his blog K5ACL has posted a short review of the case.

Image of the RSP1 Metal Case from K5ACL's review
Image of the RSP1 Metal Case from K5ACL’s review

Using the SDRplay with a W4OP Loop

Over on YouTube user SignalSearch has uploaded a video showing and explaining the use of a W4OP magnetic loop antenna on a SDRplay SDR. On the video he explains what the W4OP loop is, and demonstrates it’s operation in SDR-Console with his SDRplay. The video description reads:

Experiment: Hookup the SDRPlay RSP 1 (SDR receiver) to the W4OP (Small Transmitting Loop). I’ve always wanted to try hooking up a loop to my SDRPlay. Though different from an active receive loop (one that has a Low Noise Amplifier), this loop can be used for transmitting @ QRP levels – but works great for shortwave listening too! For more info. please visit my website @ www.k5acl.net!