Cross Country Wireless is a UK based company that has created an active HF loop antenna for only $70 USD including international shipping. The loop appears to have already been for sale for a while now, but recently they've created a new version that can be easily powered by a 5V bias tee with at least a 67 mA current capacity. This makes it very easy to use with radios that have built in bias tee's such as our RTL-SDR Blog V3 and SDRplay and Airspy units. The page reads:
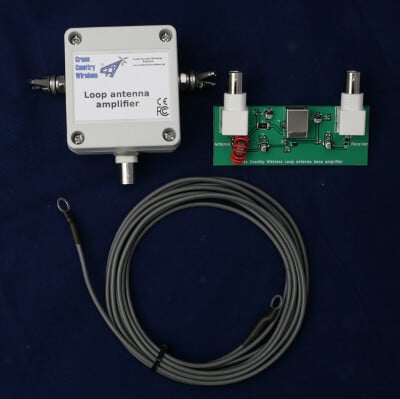
The Loop Antenna Amplifier contains all the electronics needed for home DIY construction of an active loop (magnetic loop) low noise receiving antenna.
The amplifier consists of two units, a weatherproofed outdoor unit for connection to a suitable loop and a base unit to further amplify the signal and to provide DC power up the coaxial cable to the outdoor unit.
The outdoor unit is housed in a polycarbonate box with stainless steel antenna connections and a BNC socket. The indoor unit is a PCB with two BNC connectors and a USB socket to take 5V from a USB socket on a PC or phone charger.
Like our other active antenna products it has RF overload protection to allow it to be used very close to transmit antennas without damaging the amplifier or the attached receiver.
The loop depends on what the user has available. We have tested it with simple wire loops or deltas, coax loops and an alloy loop made from a bicycle wheel rim. We supply a 3m (10 ft) length of wire as a simple loop to make a first loop for testing.
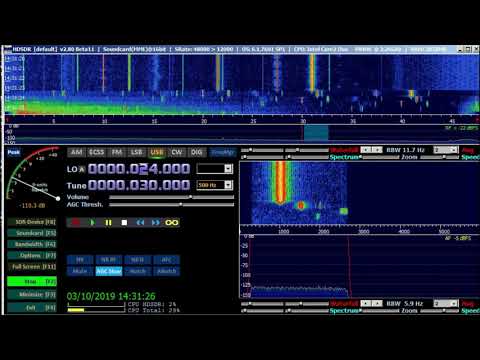
The photograph on the right shows the prototype with a 1m diameter loop of LDF4-50 coax cable as a test loop.
With a simple wire loop or delta and a small USB powerbank it makes a very compact and portable receiving antenna for holiday listening or covert use.
The latest version can now have the head unit powered directly from receivers with a 5V bias-tee such as the SDRplay receivers or some RTL-SDR dongle receivers with a bias-tee option.
Specifications:
Frequency range: 10 kHz to 30 MHz
Loop amplifier input impedance: 0.3 ohms
Output impedance: 50 ohms
Supply voltage: 5 V from USB socket or charger
Supply current (head and base unit): 112 mA
Supply current (head unit fed with 5V bias-tee): 67 mA
Loop antenna outdoor unit connectors: Two M6 stainless steel threaded studs and BNC female (RF out 50 ohms)
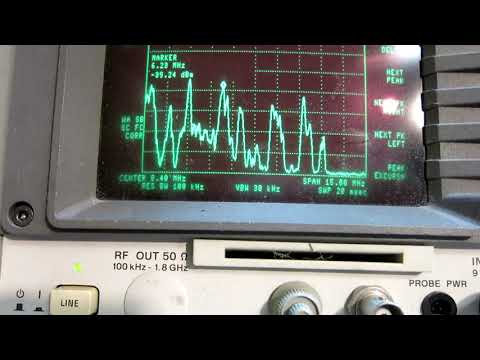
There is no comparison yet that we've seen on how this loop compares against the cheaper US$45 Chinese made MLA-30 loop. In a previous post Martin (G8JNJ) reviewed the MLA-30 and noted several design flaws after reverse engineering the circuit. He has let us know that he will also be reviewing the Cross Country Wireless Active Loop and will let us know his thoughts in the future.
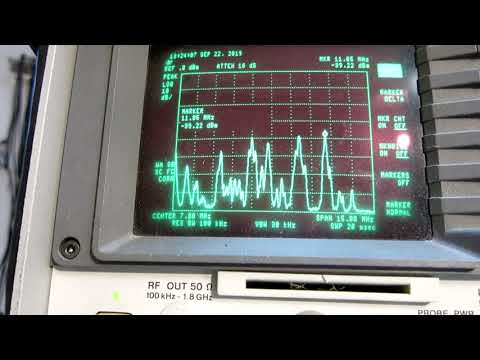
Cross Country Wireless Loop
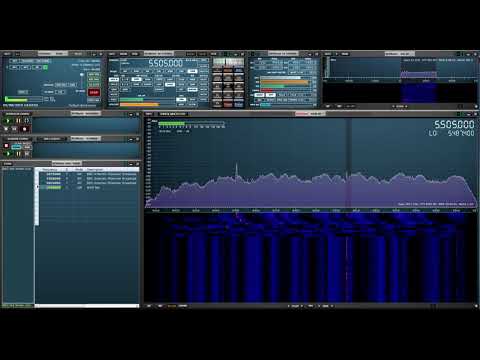
Cross Country Wireless Loop Antenna Amplifier VLF test with 1m diameter coax loop
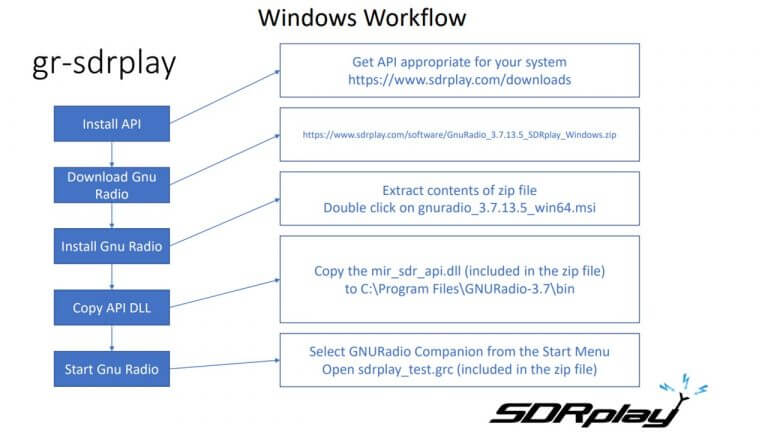
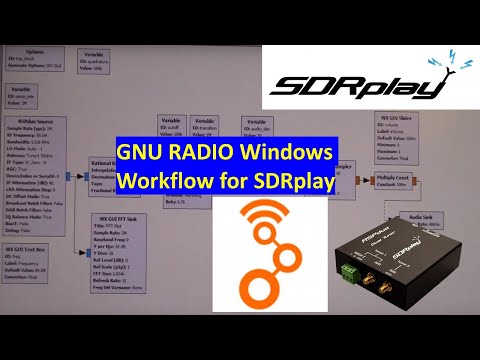
GNU radio is a popular environment for teachers and developers involved in Digital Signal Processing and exploring new radio architectures. For receiver applications, the low cost dongle is a popular hardware choice, but if you need reliable, clean, continuous radio signal reception from 1kHz to 2 GHz (without the need for block converters or external filters) then an SDRplay RSP is a useful alternative.
With help from the GNU radio foundation, SDRplay has now made available a workflow for windows for all its RSP radios: www.sdrplay.com/docs/gr-sdrplay-workflow.pdf
Special thanks goes to Frank Werner-Krippendorf (HB9FXQ) who did the original SDRplay source block development, and to Geof Nieboer who has developed the Powershell scripts which enable operation on Windows.
Leif (sm5bsz)'s series comparing the Airspy HF+ Discovery against various other SDRs such as the Perseus, SDRplay RSP1, Airpsy HF+ Dual, Airspy + SpyVerter and AFEDRI SDR-Net continues again, with parts 3, 4, and 5 now having been uploaded to YouTube. In previous posts we covered parts 1 and 2.
The comparisons are very technically inclined, so may be difficult to follow for those unfamiliar with radio theory. We have highlighted the time stamps where he discusses the results.
In conclusion, for all tests the Perseus always comes out on top, with the HF+ Discovery coming a close second. Generally third best is the HF+ Dual, then the AFEDRI, followed by the Airspy+SpyVerter and RSP1.
Part 3: Here performance with real antenna signals is compared. Attenuators are used to make the noise figure 26 dB of all radios at the output of the 7 port resistive splitter. This video is for dynamic range on 7.2 MHz.
Results @ 30:20
rx7compare-part3
Part 4: Here performance with real antenna signals is compared. Attenuators are used to make the noise figure 27 dB of all radios at the output of the 7 port resistive splitter. This video is for dynamic range on 14 MHz.
Results @ 16:04
rx7compare-part4
Part 5: Here here second order intermodulation is studied.
Leif (SM5BSZ) is fairly well known in the SDR community for doing very indepth technical tests of various SDR receivers over on his YouTube channel. Recently he's released part two of a series where he compares the new Airspy HF+ Discovery against various other SDRs such as the Perseus, SDRplay RSP1, Airpsy HF+ Dual, Airspy + SpyVerter and AFEDRI SDR-Net. In the first video he studied the blocking and second order intermodulation effects of each SDR using signal generators. We summarized those results in this previous post.
In the new video Leif compares the dynamic range of each SDR using real HF antenna signals at 7.2 MHz. In order to create a fair test of dynamic range, appropriate attenuation is added to each receiver in order to make their noise figures equivalent, so that the incoming signal strength is the same for each SDR.
The first set of dynamic range results is summarized at time 08:14, and these results show the dynamic range comparisons for strong night time signals. Again like in the other videos the Perseus is used as the reference SDR since it is always the best. The tests show that the HF+ Discovery trails behind the Perseus by only -3dB, followed by the HF+ Dual at -10dB, AFEDRI at -15dB, Airspy+SpyVerter at -18dB and finally the RSP1 at -23dB.
The second set of results is summarized at 17:47 and this includes a day time dynamic range test. The rankings are very similar to the night time test.
Recently Chinese manufacturers have begun producing a low cost wide band (100 kHz - 30 MHz) magnetic loop HF antenna known as the MLA-30. The loop can be found on eBay for under US$45 with free shipping. In the past wide band HF loop antennas have not been cheap, normally costing $300+ dollars from manufacturers like Wellbrook.
RF signals are electromagnetic waves that consist of an electric and magnetic component. A magnetic loop antenna mostly receives the magnetic portion of the wave. This is useful as most unwanted interference from modern electronic devices is generated in the electric component only. So, a magnetic loop antenna may be preferable in city and suburban environments over other antennas like wires and miniwhips. Magnetic loops are also directional, and can be rotated to avoid interference.
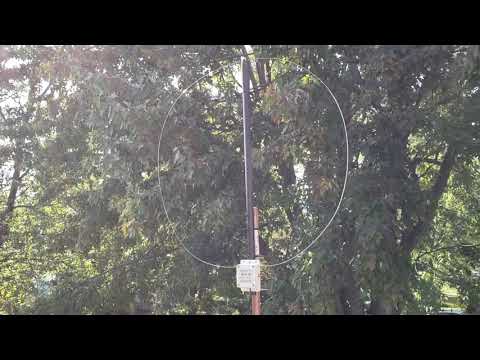
One of the biggest costs to a magnetic loop antenna is the shipping, because a large hula hoop sized piece of metal needs to be sent. The MLA-30 cuts costs on shipping by providing a folded up thin loop wire and no physical support for the loop. You are expected to provide your own support, or simply hang the loop wire on something. If you like you can also replace the included loop wire with a larger loop.
The MLA-30 comes with 10m of RG174 coax, is bias tee powered, and comes as a set with a bias tee injector that is powered over 5V USB. We tested our own unit with the RTL-SDR Blog V3, Airspy and SDRplay bias tee's and found that they all worked well instead of the included bias tee. So if you have one of those SDRs using the loop is as simple and neat as plugging it in and turning on the bias tee.
In terms of build quality, the unit is sturdy and the PCB is fully potted and protected against rain/weather. It is yet to be seen how the external screw terminals holding on the loop will age over a longer period of time however.
So how does the very cheap MLA-30 compare to higher end magnetic loop antennas? Below are some reviews by various hams and SWLs. The general consensus is that it works well for the price, but as you'd expect, falters on handling very strong signals and produces a higher noise floor compared to the more expensive loops, especially in the higher HF bands. But overall we'd say that it's probably still better than using a miniwhip, especially in suburban/city environments, and is probably the best compact HF antenna that you can get on a budget.
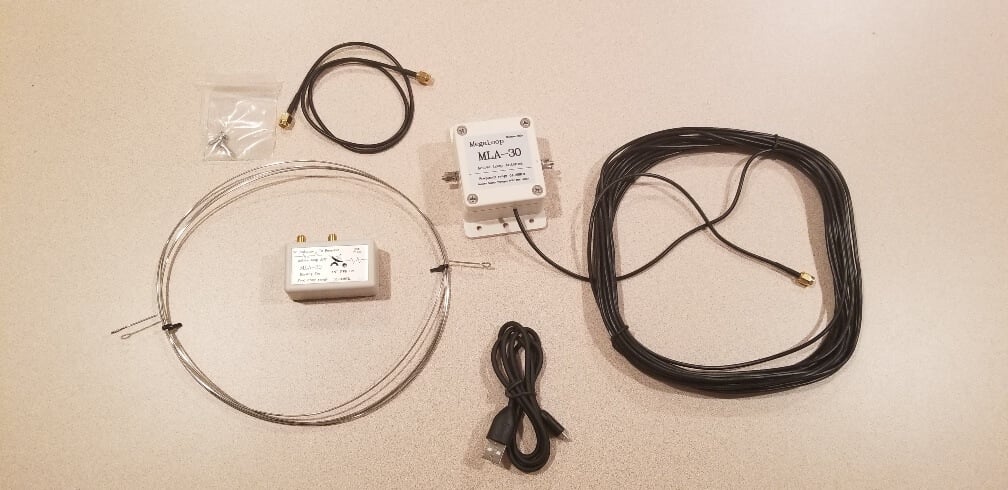
What's included in the MLA-30 set. Photo from David Day's Review.
MLA-30 Magnetic Loop Antenna Review and Comparison by David Day (N1DAY)
In this review David compares the MLA-30 against a 30-ft ground loop and a Wellbrook ALA1530-LF. His results show that while the loop is capable of receiving the same signals that the two comparison loops can, the SNR is much lower. He also notes that the much thinner loop wire used on the MLA-30 seems to result in a much deeper null, and that IMD was a problem for him.
Inside the MLA-30 Active Loop Antenna by Matt (M0LMK)
This post is a complete teardown of the antenna. As the PCB is fully potted Matt had to boil down the epoxy in order to get to the actual PCB. He notes that the PCB is a simple single amplifier design with the exposed pot working as a gain control.
Cheap Chinese Magnetic Loop Antenna (MegaLoop aka MAGALoop) MLA-30 by John
First hour battle of the antennas W6LVP loop VS MLA 30 loop test by OfficialSWLchannel
This is a YouTube video where OfficialSWLchannel compares his MLA-30 against a W6LVP loop. He notes that his initial testing shows that the MLA-30 performs as well as the W6LVP loop.
First hour battle of the antennas W6LVP loop VS MLA 30 loop test
MLA-30 Loop vs 80M EFHW by Matthew Payne
In this YouTube video Matthew compares his MLA-30 against a 80M end fed halfwave antenna with an SDRplay RSP1a.
MLA-30 Loop vs 80M EFHW
MLA-30 Magnetic Loop Modifications by Scanner and Sdr Radio
In this video the Scanner and Sdr Radio YouTube channel uses an RSPduo to compare the MLA-30 against a Wellbrook loop. His results show that the MLA-30 definitely has a higher noise floor compared to the Wellbrook, but still receives signals decently although chasing weak signals it's not good enough. He also shows how to improve the MLA-30 by replacing the cheap coax that it comes with, noting that the modification reduced his noise.
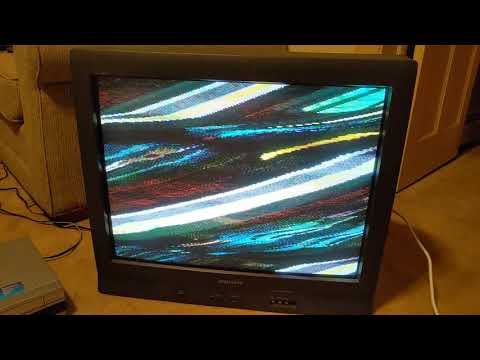
[mrgriscomredux] over on [Reddit] was interested in re-creating the nostalgia that was scrambled analog television from the 90s. To do this he captured an NTSC analog video signal using an RSP1 SDR and demodulated that into composite video using GNU Radio to process everything.
The methods that were originally used to scramble analog television are not well documented, however [mrgriscomredux] has done a fine job re-creating it himself in his own way.
He then uses a Python script to modify the “Gated Sync Suppression” within GNU Radio and then transmits that back on to the air using a low cost FL2K VGA adapter we’ve featured on the blog in the past.
These FL2K VGA adapters can be abused as crude software-defined transmitters and we’ve seen people do everything from video transmission to GPS spoofing with them. [Check out the FL2K article here]
SDR-Kits.net have begun selling low cost GPS antennas that are modified to receive the Inmarsat satellite frequencies between 1535 MHz to 1550 MHz. They also have a version for Iridium satellites that receives 1610 MHz to 1630 MHz. The antennas are powered by a 3-5V bias tee, so they should work fine with SDRplay, Airspy and RTL-SDR Blog V3 units.
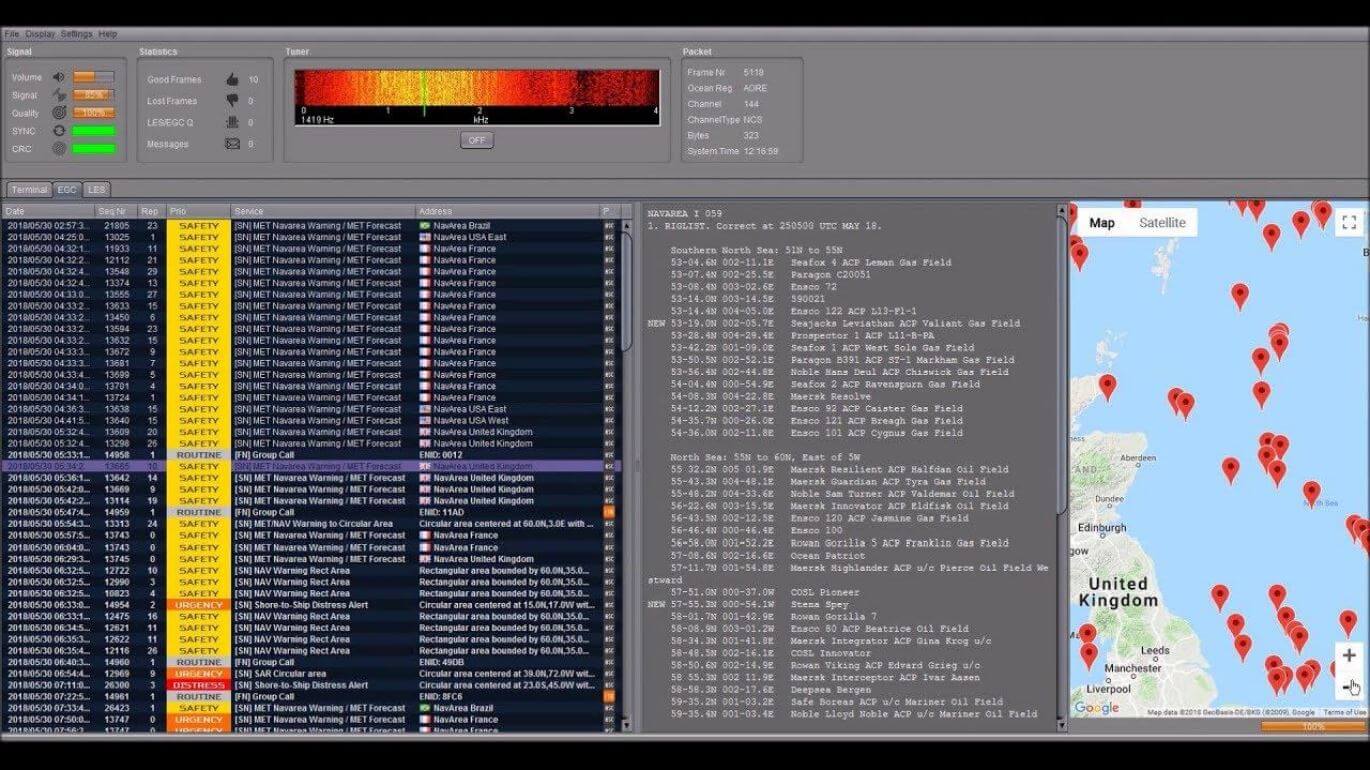
AERO messages are a form of satellite ACARS, and typically contain short messages from aircraft. It is also possible to receive AERO audio calls. STD-C aka FleetNET and SafetyNET is a marine service that broadcasts messages that typically contain text information such as search and rescue (SAR) and coast guard messages as well as news, weather and incident reports. Some private messages are also seen. To decode AERO Mike uses JAERO, and for STD-C he uses the Tekmanoid STD-C decoder.
Mike has also created a very handy bank of frequencies for the SDRUno frequency manager which can be downloaded from here.
We note that if you're interested in waiting, at the end of September we will have an L-band patch antenna set available too. Our antenna will work from 1525 up to 1637 MHz. Prototypes have shown have shown good Inmarsat, Iridium and GPS reception. More details coming next month when manufacturing gets closer to finishing up.
Screenshot of the Tekmanoid Decoder from Mikes Tutorial
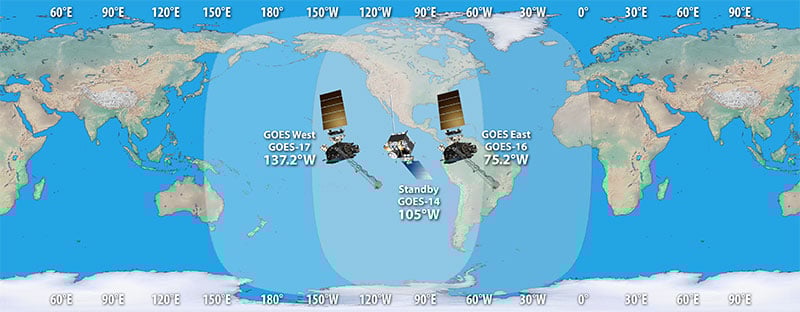
GOES 16/17 and GK-2A are geosynchronous weather satellites that transmit high resolution weather images and data. In particular they are far enough away from the earth to be able to take beautiful 'full disk' images which show the entirety of one side of the Earth. As these satellites are in a geosynchronous orbit, they can be counted on to be in the same position in the sky at all times, so no tracking hardware is required and images can be pulled down constantly throughout the day without having to wait for a polar orbiting satellite to pass over like you would with the NOAA APT or Russian Meteor satellites.
With a low cost WiFi grid dish antenna, LNA and RTL-SDR dongle, any home user within the footprint of one of these weather satellites can receive and decode live images directly from the sky. Setting up a station is overall not too difficult, but it can be a bit fiddly with a number of steps to complete. Below is our comprehensive guide. We'll show how to set up a self contained Raspberry Pi based system with goestools (free), as well as a guide for the Windows PC software XRIT decoder (US$125).
We've attempted to make the tutorial as newbie friendly as possible, but we do need to assume basic RF knowledge (know what antennas, SDRs, coaxial, adapters etc are), basic Linux competency for the goestools tutorial (using the terminal, using nano text editor), and basic Windows competency for the XRIT decoder tutorial (unzipping, editing text files, running programs).
A full disk false color image received directly from the GOES-17 satellite with an RTL-SDR. Click for the full size image (14MB).
There are two fourth generation NOAA GOES satellites that are currently active, GOES-16 and GOES-17. These transmit HRIT signals, and also transmit shared data from the older third generation GOES 15, and Japanese Himiwari8 satellites. At the moment GOES-16 and GOES-17 are producing full disk images every 30 minutes, and close up "mesoscale" shots of the USA every ~15 minutes. GOES-16 (aka GOES-R) and GOES-17 (aka GOES-S) are also known as GOES-EAST and GOES-WEST respectively. At least one of these satellites can be received from North/South America, Canada, Alaska/Hawaii, New Zealand, Eastern Australia and some pacific islands.
There is also the older generation GOES-15 and GOES-14 which have been placed in standby orbits. These transmit LRIT signals which provide images at a slower rate.
GOES 16/East and GOES 17/West Signal Footprint
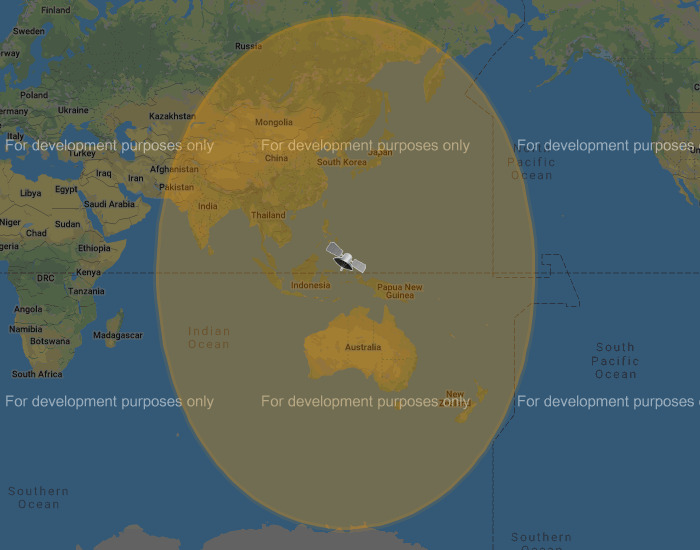
There is also the Korean GK-2A (GEO-KOMPSAT-2A) satellite which is very similar to the GOES satellites. GK-2A covers countries like India, Asia, Australia, New Zealand and parts of Russia. Note that you may have previously heard of the COMS-1 satellite which used to cover this area. Since July 2019 COMS-1 was replaced by GK-2A. Unlike GOES, GK-2A images are encrypted. However it has been found that "sample" encryption keys found online in demo code work just fine.
GK-2A contains both LRIT and HRIT channels, but at the moment only the LRIT channel can be decoded with the currently available software. The LRIT channel sends full disk IR images every 10 minutes in 2200 x 2200 resolution. Compared to the 5424 x 5424 resolution GOES full disk images, this is smaller, but still large enough to be interesting.
Note that even if HRIT decoding is added by the current software, you would require an Airspy or other wideband SDR as the GK-2A HRIT signal bandwidth is 5 MHz. Also since the HRIT bandwidth is so wide, the signal strength is reduced, meaning that you'll need a larger dish. People who have received the HRIT signal note that a 3M+ sized dish seems to be required.
GK-21 (GEO-KOMPSAT-2A) Footprint
You might ask why bother receiving these satellite images directly, when you can get the exact same images from NOAA at https://www.star.nesdis.noaa.gov/GOES/index.php. Well, you might want to set up your own station to be independent from the internet, or you live in a remote location without internet, or maybe just for the fun and learning of it.
To set up a receiver for GOES 16/17 HRIT or GK-2A LRIT you'll need to purchase a dish antenna such as a cheap 2.4 GHz WiFi antenna, an RTL-SDR, GOES LNA, and a Raspberry Pi if using goestools, otherwise a Windows PC can be used. The total cost could be anywhere from $150 - $200 depending on what pieces you already have available.
Before we start the tutorial, you might want to use an augmented reality Android app like "Satellite-AR" to get a rough idea of where either GOES 16/17 or GK-2A (GEO-KOMPSAT-2A) is in your sky, and if receiving them is even feasible for your location. You'll need to find an area on your land where you can mount a small satellite dish with an unobstructed line of sight view to the satellite (no trees or buildings can be blocking the signal path). If the satellite is low on the horizon (below 25 deg elevation), then things get a little more difficult as you have more obstructions and a weaker signal. But it can still be done, and we're able to routinely get good results at 24.5 deg elevation.
Note that for Europe and Africa, unfortunately there are no satellites that can be received easily with an SDR and LNA. But you might instead be interested in the EUMETCAST service, which can be received from EUTELSAT 10A (Ku band), Eutelsat 5 WEST A (C Band) and SES-6 (C Band) . To receive this service you'll need a DVB-S2 receiver and a satellite dish with appropriate band LNB. You also need a license keys and software which all together cost €100. EUMETCAST reception is not covered in this tutorial, instead see this video.