SignalsEverywhere PlutoSDR Videos: Applying the Frequency Extension and Dual Core CPU Hacks and Running on SDR#

Over on the SignalsEverywhere YouTube channel, Corrosive has uploaded two new videos about the PlutoSDR. The PlutoSDR is a low cost (typically $99 - $149) RX/TX capable SDR with up to 56 MHz of bandwidth and 70 MHz to 6 GHz frequency range. It also has an onboard FPGA and ARM Cortex-A9 CPU.

By default the bandwidth and frequency range of the PlutoSDR is limited to only 20 MHz and 325 MHz - 3.8 GHz. A minor hack which requires some commands to be input via a terminal screen is required to unlock its full potential, and in the first video Corrosive runs through how this hack can be applied. He also shows an additional hack which unlocks a second CPU core which can be useful for increasing the available CPU power for apps running on the PlutoSDR's ARM processor.

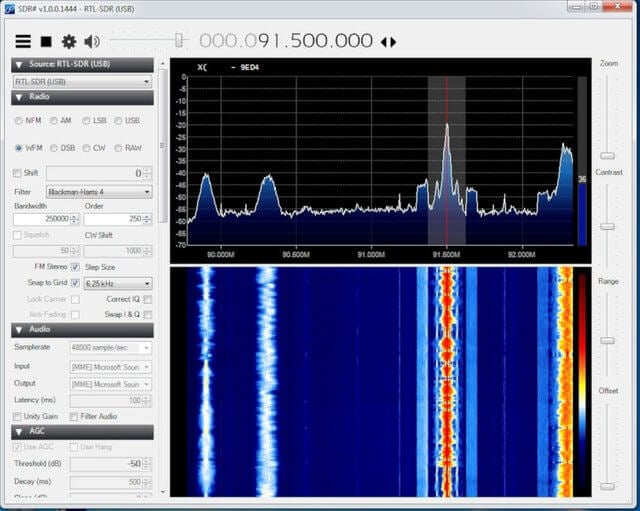
In the second video Corrosive shows how to install the PlutoSDR SDR# plugin, which allows the PlutoSDR to run in SDR#. He then shows how to actually use the plugin to connect to the PlutoSDR.

Adalm Pluto SDR Tutorial: 70Mhz to 6Ghz and Dual Core CPU Modification

Adalm Pluto SDR Sharp Plugin Tutorial ~ [Infamous SDR# on Your Pluto]

Running SDR# in a Windows Virtual Machine on Linux

Thanks to John Jackson of JRMagnetics for writing in and letting us know about his post on installing SDR# onto a Windows Virtual Machine (VM) running on Fedora Linux.

As John notes, running SDR software from within a virtual machine essentially freezes a working version of your setup in a virtual image. It's then possible to put the image on a memory stick and take your entire working software setup with you and run it on another PC. Using a fixed image then also avoids problems with OS updates breaking things, as updates can be safely turned off on the virtual machine. Any damage from viruses is localized to the virtual machine only.

During his research John found many people who have been running Linux from within a virtual machine running on Windows, but not the reverse. Originally he tried running a Windows VM from within Windows, but he experienced crashes. Only when using Linux as the base OS was his Windows VM stable.

In his setup he runs Fedora 26 as the base Linux OS (although other Linux versions should also work), and Windows 7 in the Virtual Machine. He uses Oracle VirtualBox as the virtualization software. Once Windows 7 is installed on the Virtual Machine, setting up software like SDR# is as simple as going through our quickstart guide.

SDR# Running in a Windows Virtual Machine

New SDR# Plugin Adds Support for Contour Shuttle USB Controllers

Contour ShuttlePro V2

The Contour Shuttle Express and Pro V2 are USB controller accessories for PCs. They consist of a knob-like wheel with multiple buttons and they are designed as a keyboard replacement for improving the productivity of video/photo editors. However, several people have found them useful for controlling software defined radio receiver programs like SDR#.

Recently SDR# plugin developer Eddie Mac has released a new SDR# plugin that provides native support for the Shuttle devices from within SDR# itself. The plugin allows you to dynamically map the Shuttle's buttons and wheels to functions within SDR#.

Eddie also writes:

There was no wrapper available for Contours Windows SDK so I created a managed .NET wrapper around contours dll. If anyone wants to develop their own software for these devices I will happily provide them with my .NET wrapper for free as well as a demo app to instruct on its usage.

Contour Shuttle Plugin for SDR#

Steve M Talks about Osmo-FL2K at Osmocom Conference 2018

Osmo-FL2K can be considered as the [evil] transmit-side brother of RTL-SDRs. It is a driver that allows cheap $5 - $15 USB 3.0 VGA adapters to be used as a transmit-only capable SDR. It might be considered [evil] as transmitting illegally and without filtering can pollute the RF spectrum, but being responsible with it and using appropriate filters could enable extremely low cost transmitters.

Recently at the October 2018 Osmocom Conference, Steve M, the man behind the Osmo-FL2K discovery and software (and heavily responsible for the development of RTL-SDR too) has given a talk titled "osmo-fl2k - the [evil] transmit-side brother of RTL-SDR". In the past he's also given a similar talk that we posted about previously.

The talk goes over the discovery and reverse engineering of Osmo-FL2k, discussion of the application itself, some signals that have been successfully transmitted and some measurements.

Osmocom is behind the discoveries of RTL-SDR and OsmoFL2K. If you'd like to support them please donate at OpenCollective, and check out their other projects at osmocom.org.

osmo-fl2k - the [evil] transmit-side brother of RTL-SDR

YouTube Tutorial: Software Set up for a Portable Raspberry Pi and RTL-SDR Based NOAA Weather Satellite Receiver

Last year in December we posted about Matt's element14 sponsored video which showed us how to create a portable briefcase contained NOAA satellite received based on a Raspberry Pi and RTL-SDR dongle. The build consisted of a heavy duty briefcase, modified ATX PSU and stripped down LCD monitor panel. This build resulted in a rugged and portable receiver. The full series of videos demonstrating the briefcase, ATX PSU conversion, LCD teardown, and NOAA satellite receiver demo can be found on his YouTube Playlist.

In his latest video Matt goes over the software installation procedure for creating an automated NOAA weather satellite receiver on the Raspberry Pi. He uses gpredict for predicting the satellite passes, and the Raspberry Pi version of WXtoImg for decoding the images. The rest of the video shows how to set up the software for your particular location, and how to set up decoding automation.

How To Set Up a Raspberry Pi as a NOAA Satellite Receiver with RTL-SDR

Using an Airspy HF+ with SDR# and WSJT-X to Decode FT8 + SpyServer FT8 Decoding Demo

Over on YouTube user TheGazLab has uploaded a video that reviews the Airspy HF+, and also shows how to use the HF+ with SDR# and WSJT-X in order to create a FT8 monitor. The Airspy HF+ is high dynamic range HF/VHF receiver designed for DXing.

In the video TheGazLab demonstrates to us the decoding in real time, and explains the CAT control SDR# plugin that he's using. The CAT control plugin when combined with a virtual serial port driver allows the WSJT-X program to automatically tune SDR# to the FT8 frequency selected in WSJT-X.

Later in the video he also discusses the SpyServer network which allows SDR# users to connect to remote public Airspy and RTL-SDR units over the internet. He demonstrates connecting to a public server in the UK, and decoding FT8 via the remote server. The video also shows the new SpyServer interface by  which nicely lays out the world SpyServer network on a map, making it easy to choose a desired location to listen to.

Airspy HFPlus, SDR# and WSJT-X with full CAT control decoding FT-8

rtl_map: A Simple FFT Visualizer for RTL-SDR

Thank you to 'KeyLo99' for submitting news of the release of his new RTL-SDR based program called rtl_map. rtl_map is a currently a simple app that uses an RTL-SDR to display an FFT frequency graph. It is based on the gnuplot and fftw3 libraries.

Over on our forums KeyLo99 describes the motivation behind the project as mostly being a good reference program for people wanting to learn how to read and process IQ data from the RTL-SDR:

I'm a RTL-SDR researcher and DSP learner currently working on a project for properly figuring RTL2832 and I/Q fundamentals out. The project is about reading raw I/Q samples, processing samples and creating FFT graph from them. I tried to explain what I'm doing in detail with comment lines. I'm hoping that I will be helpful to RTL-SDR beginners with this rtl_map [C] project. Another purpose of the rtl_map project is making a frequency scanner application for signal security researches.

FFT Plot from rtl_map

Running GQRX Smoothly on an Intel Compute Stick with a Custom Linux Kernel

Thank you to M Khanfar for submitting news about his custom Linux kernel which allows an RTL-SDR and GQRX to run smoothly and with sound on an Intel Compute Stick. The Intel Compute Stick is a full dongle based computer the size of a pack of gum with pricing that starts from US$120. It has a Quad Core Atom Processor, 2GB RAM, 32 GB of built in storage and an HDMI out port. By default the stick comes with Windows 10 installed, but M Khanfar notes that it is very sluggish.

Instead of the sluggish Windows 10 OS, M Khanfar decided that he wanted to run Ubuntu Linux instead. However he found that the standard Ubuntu image did not have support for audio over HDMI or WiFi on the Compute stick. So he built his own custom kernel with some patches to fix this issue. With the issue fixed, GQRX with an RTL-SDR now runs smoothly with full audio support, and rtl_tcp can also be run over WiFi.

M Khanfar has uploaded the patched ISO to his Google Drive here.

Update 29 January 2019: M Khanfar has updated us and noted that CubicSDR now works on the custom kernel too, and he has provided full installation instructions here. A video showing it in action can be seen on YouTube.

GQRX under Custom Kernel-Intel Computer Stick