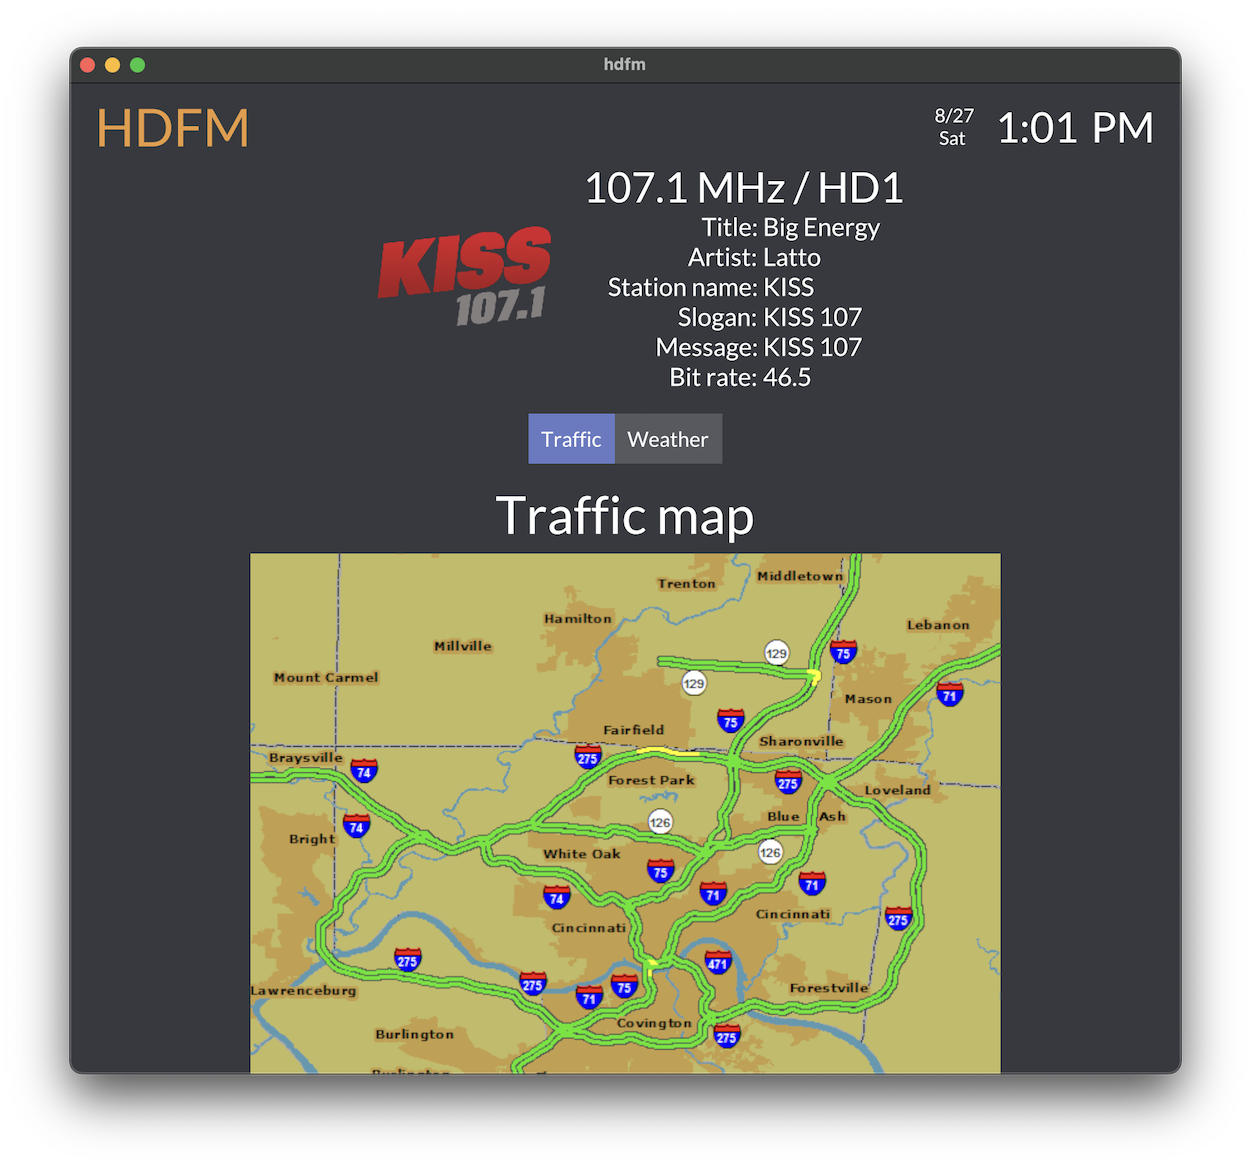
Back in 2017 we first posted about KYDronePilot's HDFM software which allows users to display the live weather and traffic data embedded into some HDFM signals.
If you are in the USA, you might recognize HD Radio (aka NRSC-5) signals as the rectangular looking bars on the frequency spectrum that surround common broadcast FM radio signals. These signals only exist in the USA and they carry digital audio data which can be received by special HD Radio receivers. Earlier in in 2017 a breakthrough in HD Radio decoding for SDRs like the RTL-SDR was achieved by Theori when he was able to piece together a full HD Radio software audio decoder that works in real time.
It turns out that some of these HD Radio signals run by iHeartRadio also contain other data streams such as live weather and traffic data that is consumed by HD Radio based car GPS receivers or audio head units in US vehicles. HDRadio.com also write that they can embed other data such as sports scores and emergency messages into the data stream as well.
FISSURE (Frequency Independent SDR-Based Signal Understanding and Reverse Engineering) is a recently released open source framework that runs on Linux, and includes a whole suite of previously existing software that is useful for analyzing and reverse engineering RF signals. On top of that it includes a custom GUI with a bunch of custom software that ties everything together in a full reverse engineering process.
Recently the developers spoke at this years Defcon conference, and the talk video is supplied at the end of this post. In their talk they explain the purpose of FISSURE, before going on to demonstrate it being used to reverse engineer a wireless X10 doorbell. FISSURE makes analyzing the signal easy, starting with spectrum analysis to find the signal, then signal recording, signal cropping, signal replay, crafting packets and crafting attacks.
News and developments about FISSURE can also be seen on their Twitter.
FISSURE is an open-source RF and reverse engineering framework designed for all skill levels with hooks for signal detection and classification, protocol discovery, attack execution, IQ manipulation, vulnerability analysis, automation, and AI/ML. The framework was built to promote the rapid integration of software modules, radios, protocols, signal data, scripts, flow graphs, reference material, and third-party tools. FISSURE is a workflow enabler that keeps software in one location and allows teams to effortlessly get up to speed while sharing the same proven baseline configuration for specific Linux distributions.
The framework and tools included with FISSURE are designed to detect the presence of RF energy, understand the characteristics of a signal, collect and analyze samples, develop transmit and/or injection techniques, and craft custom payloads or messages. FISSURE contains a growing library of protocol and signal information to assist in identification, packet crafting, and fuzzing. Online archive capabilities exist to download signal files and build playlists to simulate traffic and test systems.
The friendly Python codebase and user interface allows beginners to quickly learn about popular tools and techniques involving RF and reverse engineering. Educators in cybersecurity and engineering can take advantage of the built-in material or utilize the framework to demonstrate their own real-world applications. Developers and researchers can use FISSURE for their daily tasks or to expose their cutting-edge solutions to a wider audience. As awareness and usage of FISSURE grows in the community, so will the extent of its capabilities and the breadth of the technology it encompasses.
FISSURE RF Framework - Griffiss Institute & AIS Monthly Lecture + Education Series
Over on YouTube TheSmokinApe has uploaded a video showing how to use the direct sampling mode on RTL-SDR Blog V3 devices to receive HF transmissions, such as the ham bands, short wave and AM broadcast. In the video he shows how to activate direct sampling mode in SDR#, and then goes on to show reception of a few HF signals.
We note that an appropriate HF capable antenna is required to receive HF signals. The multipurpose dipole kits we sell are for VHF/UHF reception only. A simple and low cost HF antenna could just be a long wire running through your house.
Thank you to Samual Yanz (N7FNV) for submitting a guide that he's created about tracking and decoding NOAA weather satellites. The guide can be downloaded from this link as a PDF.
Currently there are three operational polar orbiting NOAA weather satellites that transmit image data in the APT format at 137 MHz. When one of these satellites pass overhead, it is possible to use an RTL-SDR with appropriate satellite antenna and software to receive the satellite weather images they transmit.
Samual's guide focuses on the software and shows how to setup Virtual Audio Cable for piping audio between programs, SDR# for receiving the signal, Orbitron for tracking the satellite and WXtoIMG for decoding the image.
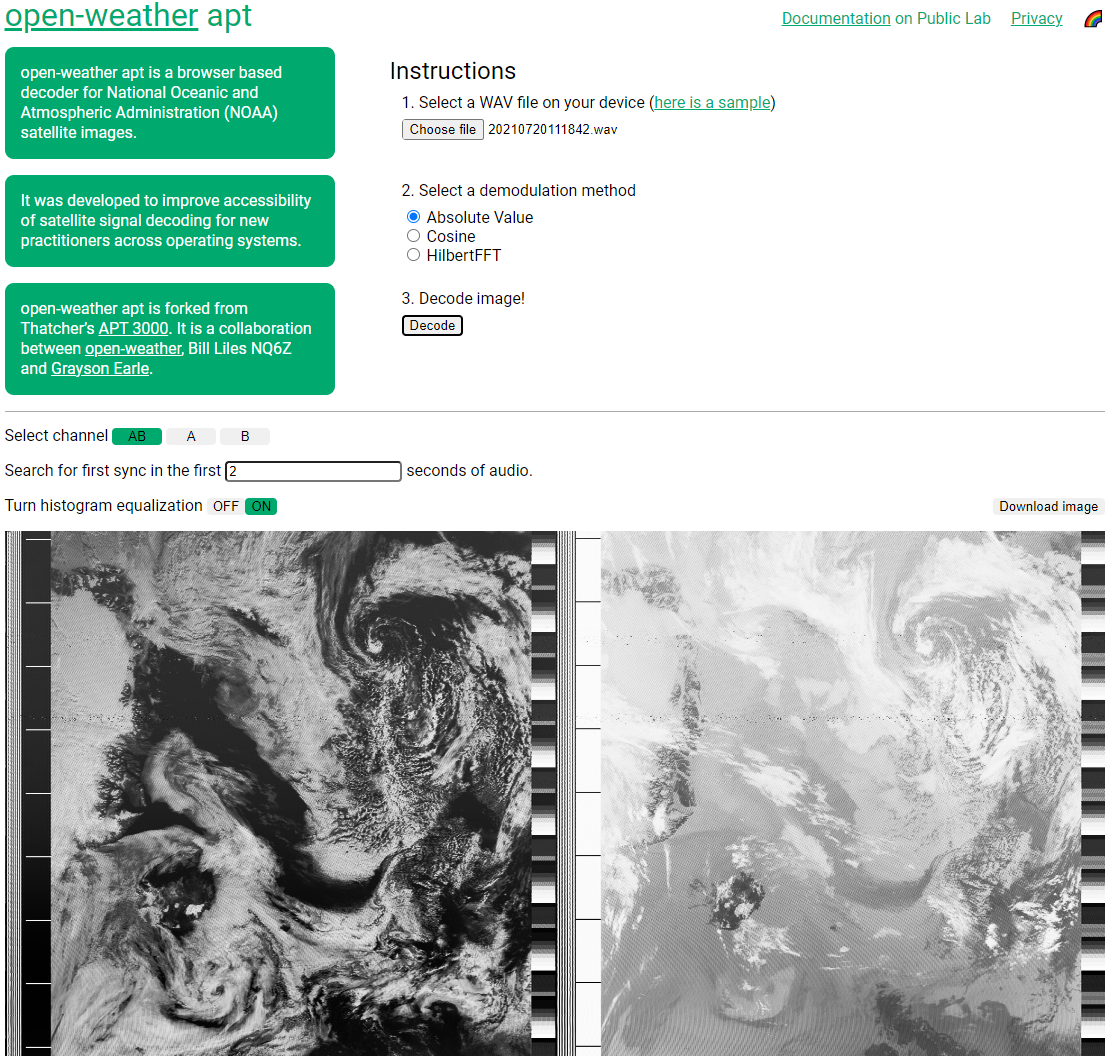
Thank you to Sasha Engelmann for letting us know about the release of the Open-Weather community's web browser based NOAA APT decoder. The decoder allows for easy NOAA satellite decoding by allowing you to upload a wav file recording of a NOAA satellite pass, and it will decode it into an image within the browser.
The project emerged from a desire to understand the process of decoding APT audio recordings into NOAA satellite images, and a need for an accessible browser-based decoder for new practitioners during open-weather DIY Satellite Ground Station workshops.
While we were inspired by Thatcher's APT 3000, we felt accessibility, documentation and features could be expanded and improved. open-weather apt allows you to select an audio file on your computer, choose a demodulation method, add histogram equalisation and download images. The website does not store your personal data, including your location or any files you upload.
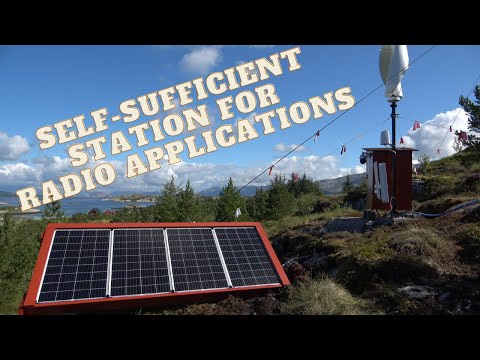
Over on the usradioguy.com blog, Carl Reinemann has highlighted a very impressive remote off-grid radio satellite image receiver setup by Manuel Lausmann (DO3MLA). The setup consists of two Raspberry Pi's, two RTL-SDRs and a QFH satellite antenna connected to an antenna splitter and bias tee. It is able to receive APT and LRPT images from NOAA and Meteor satellites which transmit at 137 MHz. The received images are then uploaded to the internet via a mobile LTE router.
The system is located a remote part of Northern Norway and is powered by a dual solar and wind turbine system with battery storage. Being so remote with little interference, the system is able to receive very clean images, and with the location being so Northern, it can even glimpse the north pole.
Manuel has uploaded a YouTube video where he shows each part of the system. It is in narrated in German, however the YouTube caption auto translate feature can be used.
He notes that in the future he hopes to install a web SDR like KiwiSDR on the site too.
The SunFounder TS7-Pro 7-Inch Touch Display is a portable high resolution 1024x600 7-inch touch screen with space on the back for a Raspberry Pi 4 to be mounted. It is also possible to mount an optional 2.5" SSD and 'PiPower' battery mount. The price of the TS7-Pro is currently reduced to $79.99 on Amazon and $89.99 in their direct store.
Last year in October we reviewed the 'RasPad 3.0' another SunFounder product that is a portable tablet enclosure for the Raspberry Pi 4. The RasPad is a more complete setup offering a full enclosure and built in battery. We reviewed the RasPad as we were curious to see how easy it would be to integrate a RTL-SDR on the inside. With some minor modifications we were able to successfully do this and create a portable RTL-SDR station. The RasPad 3.0 is a more costly device at US$259 on Amazon and $219 on their direct store.
This year SunFounder reached out to us again and asked if we wanted to test their TS7-Pro display, and see if it is possible to integrate an RTL-SDR.
Unboxing and General Assembly
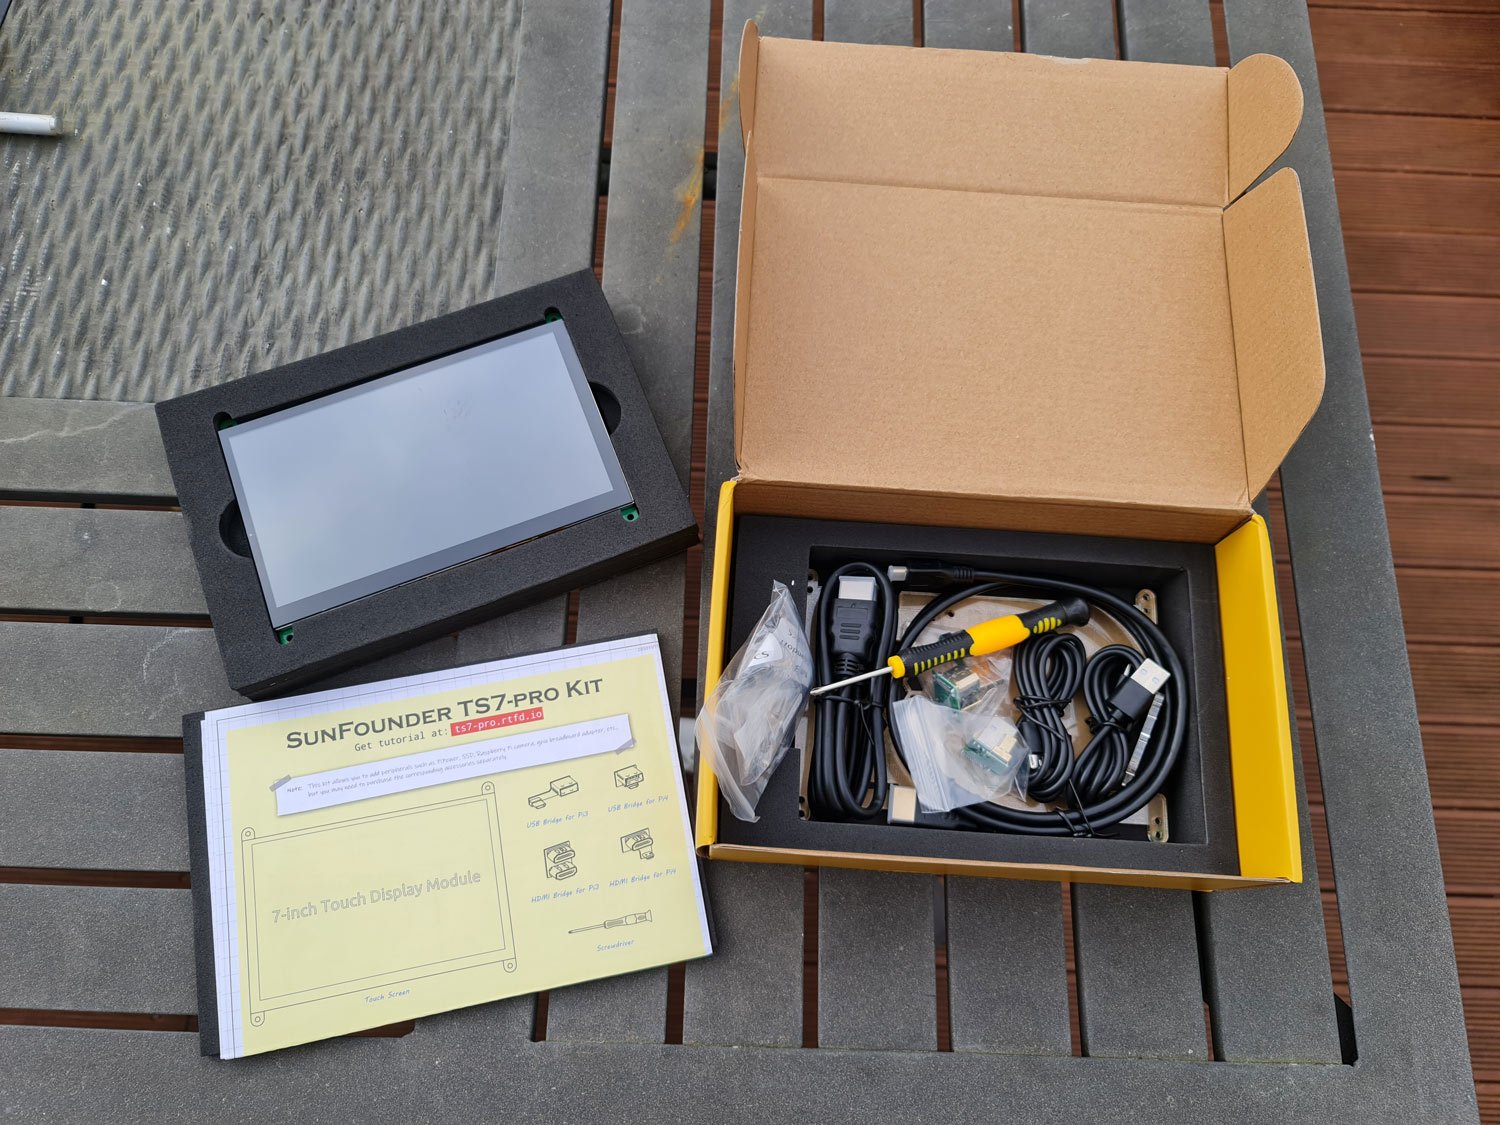
SunFound TS7 Pro Boxed
The TS7-Pro comes packed well with foam. Inside is the manual, acrylic cover, 2x HDMI and 2x USB cables, 2x USB-USB bridge adapter (one for the Pi 4 and one for the Pi 3), 2x Micro-HDMI to HDMI bridge (one for the Pi 4 and one for the Pi 3), various M3 screws, a screwdriver and the LCD screen itself. The cables are designed for people who want to use the screen as a suppletory PC screen, so we did not end up using them.
SunFounder TS7 Pro Unboxed
The rear of the LCD screen contains all the LCD driver circuity as well as speaker and mounting points for the Raspberry Pi to connect it's GPIO header. The required HDMI and USB connections between the Raspberry Pi and LCD screen are handled by small bridge connectors.
SunFounder TS7 Pro LCD Rear PCB
The assembly process is very simple. Just mount the Raspberry Pi on the back, connect up the HDMI and USB bridge adapters, and screw on the acrylic backing plate.
There is also a very useful metal kickstand on the back which allows the screen to sit almost upright for easy viewing when placed on a surface.
RTL-SDR Modifications
The acrylic backing plate is designed to be able to mount a 2.5" SSD and/or a 'PiPower' battery module. Instead of using these accessories we decided to see if we could instead fit an RTL-SDR Blog V3 and our own USB battery pack on the back.
The acrylic plate has several screw and venting holes which we made use of to simply zip tie the RTL-SDR onto the back. We then used a short USB extension cable with a right angle connector between the RTL-SDR and Pi 4. There is plenty of space on the inside between the PCB and acrylic plate, so the RTL-SDR can be hidden away with the antenna port still easily accessible.
The USB battery pack is a bit larger, so fits on the outside of the enclosure also via zip ties.
Portable RTL-SDR with SunFounder TS7 ProShowing how much space is available between the PCB and acrylic plate.
After tightening down the zip ties, and hiding away the excess cabling, the whole construction is stable and not likely to fall apart easily.
Operating and Testing
Both the LCD screen and Pi 4 need to be powered separately. So you will need a battery pack that can support at least two outputs, and one that can support the required power draw of the Raspberry Pi whilst also powering the LCD screen.
We also initially connected a simple whip antenna to the RTL-SDR, but had to change that later as we will discuss.
RTL-SDR and Battery Pack Zip Tied to the TS7 Pro
For software we installed the Pi64 version of DragonOS, which is a ready to use Pi 4 image that has many RTL-SDR compatible programs built into it. A reminder that any software issues we discuss are unrelated to the SunFounder hardware.
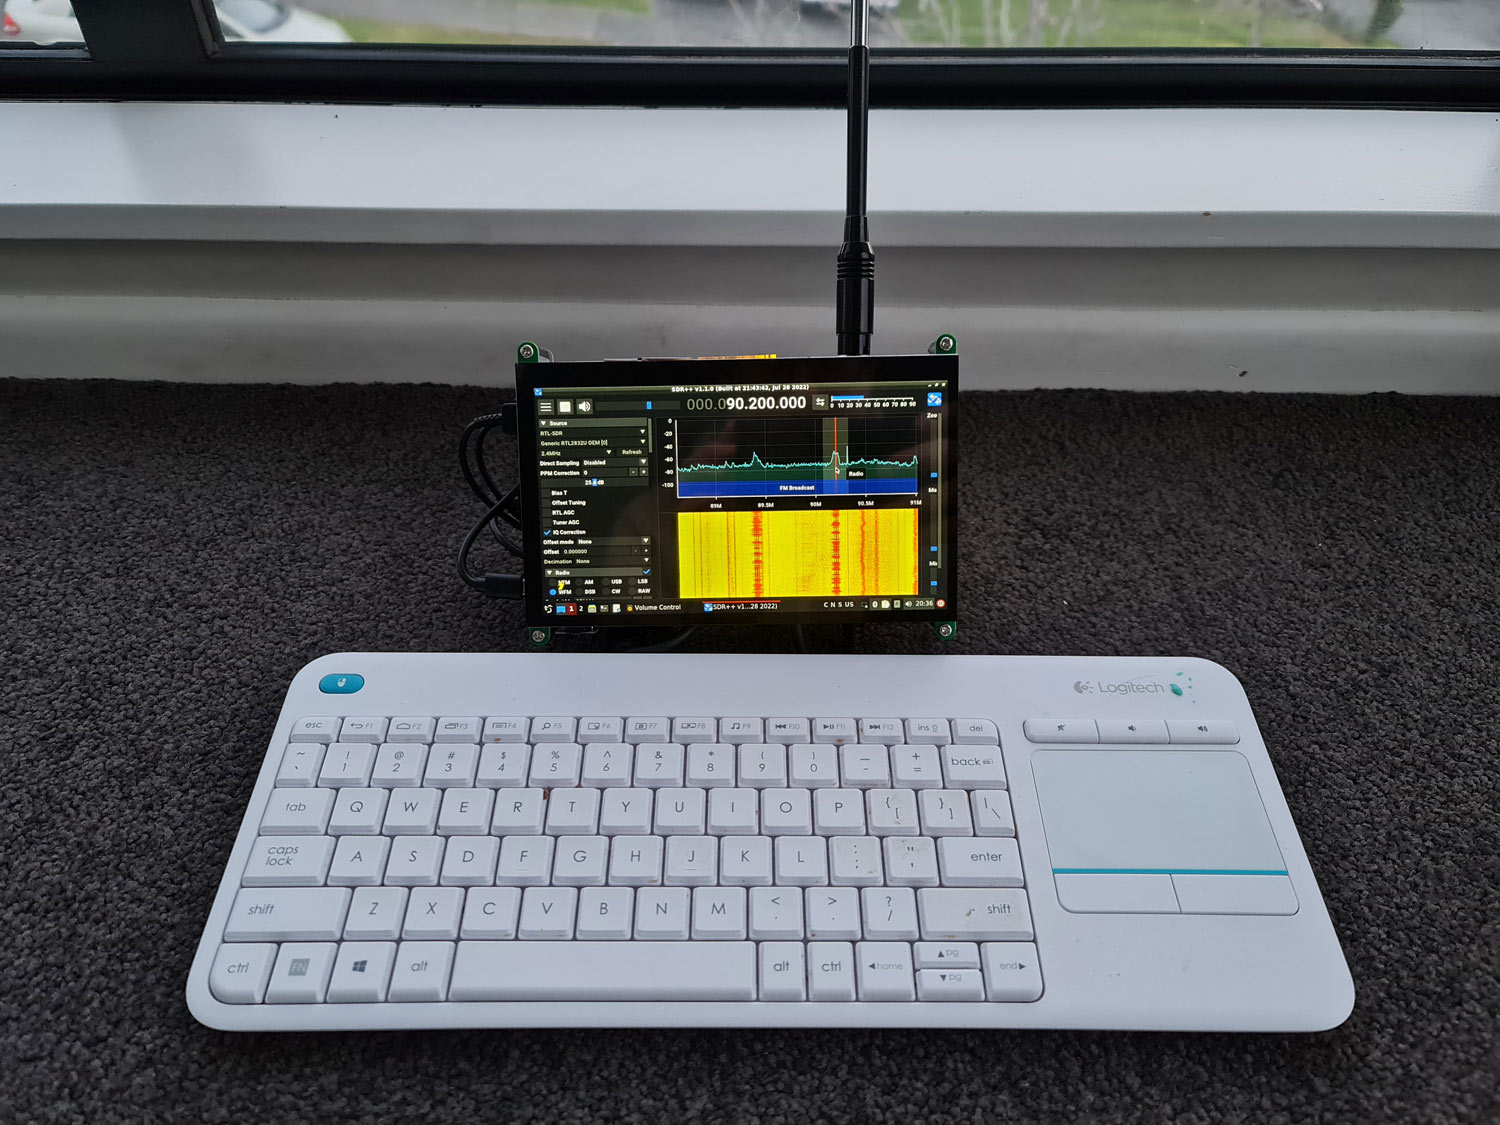
The touchscreen works as expected, however we did notice that there is an initial bug on boot where the onscreen keyboard won't work unless you try to log in once with an empty password first. However, as we discovered in the RasPad review, most SDR programs like SDR++ are not very well suited to touch screens, so in the end we ended up connecting a wireless keyboard for ease of use.
Using a keyboard ended up also being a requirement in our tests, because the way we mounted the RTL-SDR meant that the screen was upside down. Using the screen in this 'upside down' orientation was preferred as the kickstand makes it sit a bit more upright and keeps the antenna more vertical. To get around the upside down screen we had to flip the screen in Ubuntu settings. Unfortunately flipping the screen does not also flip the touch screen inputs, so our touch inputs became inversed. There seem to be ways to fix this but we did not look further into the issue.
One other minor annoyance is that we found that the LCD screen would not get recognized by the Pi 4 when the keyboard's USB dongle was connected at boot. This may just be a Pi 4 issue, or an issue with our power pack unable to provide enough current at boot, as we have encountered similar issues in the past with Pi 4's used in other projects. Once the first text appears on the screen, connecting the keyboard USB dongle is possible.
With a keyboard connected, SDR++ opened and ran smoothly, and looks great on the 7 inch screen. We note that we did have to apply a small configuration fix in the Ubuntu sound settings in order to get the built in speakers to work. The fix is the same one used in the RasPad review, so please see that review for more information.
With it's somewhat open back, cooling doesn't seem to be an issue and we never noticed the Pi 4 throttling, or the RTL-SDR overheating.
RTL-SDR TS7-Pro with Wireless Keyboard
LCD Screen Interference
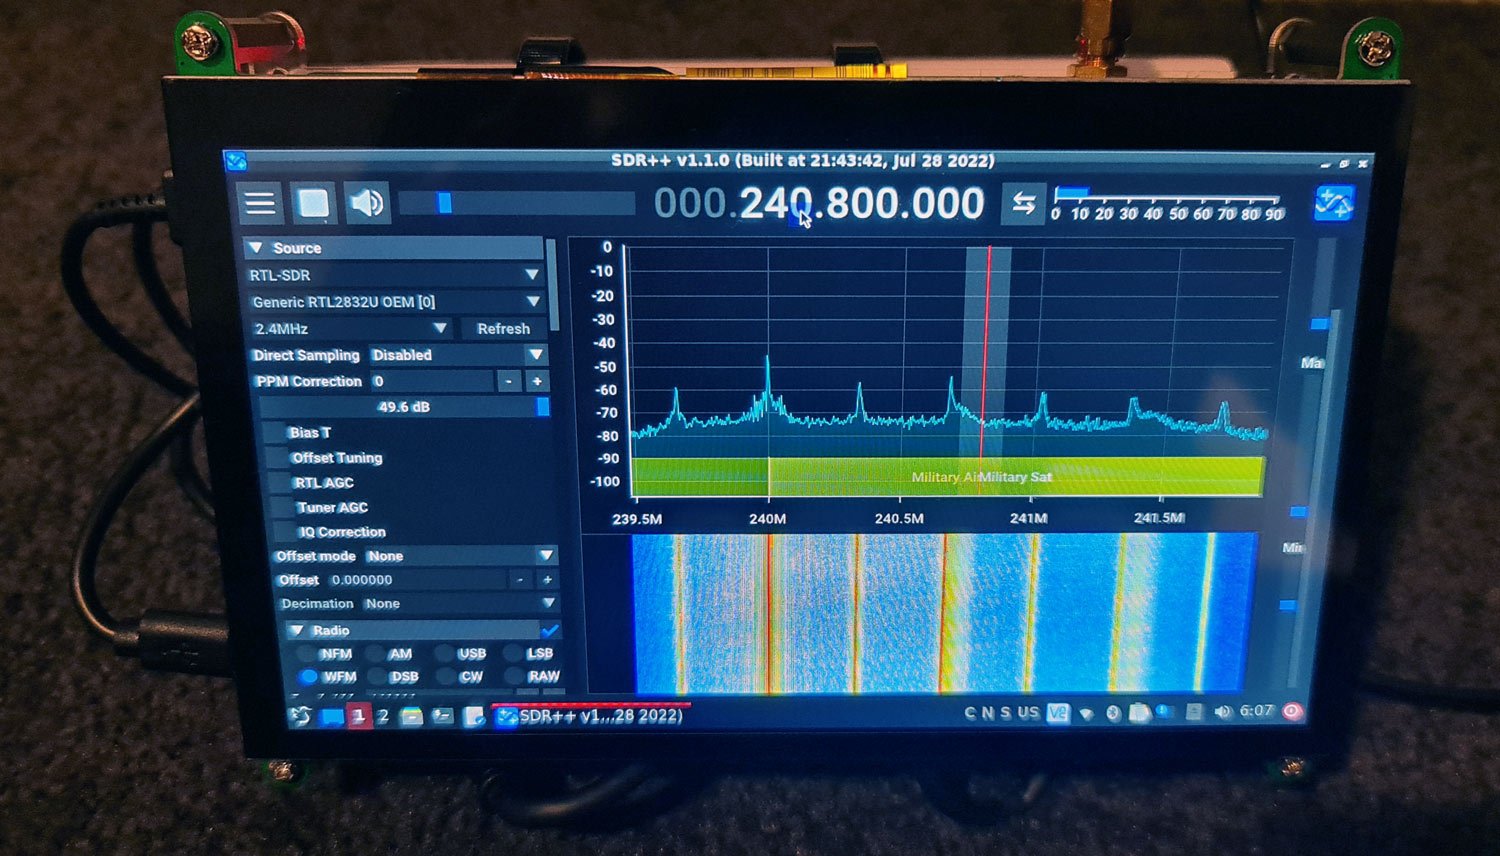
Again as we noted in the RasPad review, LCD screens are known to be big sources of RF interference and having the dongle and antenna this close to the screen electronics is not ideal. The image below shows what interference from the LCD screen looks like on the spectrum. Interference on the TS7 screen appears to be more pronounced when compared to the RasPad, possibly due to a different driver PCB with more exposed ribbon cables.
RF Interference from the TS-7 Pro LCD Screen
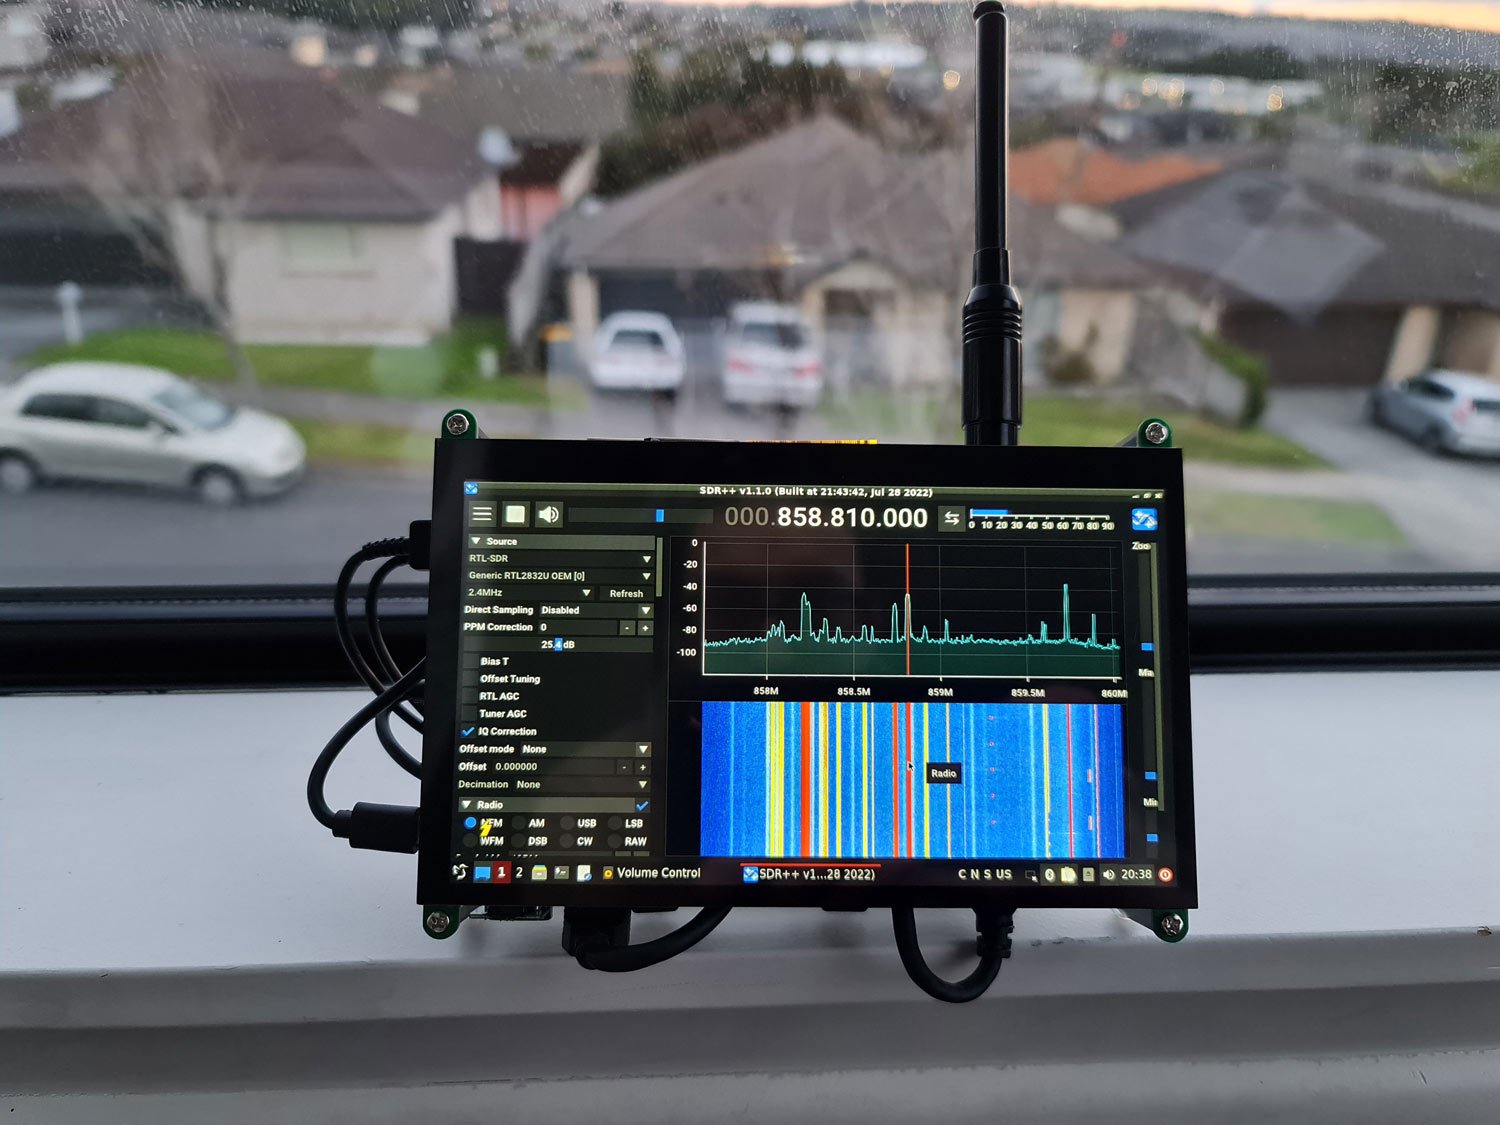
This interference is not present on all bands, and once an external antenna is used with a few meters of coax distance away from the LCD the problem reduces, but it doesn't go away fully. With an antenna disconnected there is almost no interference seen at full gain, so most of the interference appears to come through the coax cable and antenna. So we recommend using high quality shielded coax, as well as getting the antenna away from the LCD screen too.
Using a directly connected whip on a band with no LCD RFI
Conclusion
The SunFounder TS7 Pro is a nice and low cost product that allows you to easily connect a Raspberry Pi 4 to a touchscreen. Unlike the RasPad it does not come with a battery or enclosure, but this allows for a smaller form factor. The LCD screen itself is high quality, bright and with good viewing angles.
Hacking an RTL-SDR and battery pack onto the back of the SunFounder TS7 LCD display is easily possible and does result in a very nice portable form factor. However, there are still wires hanging out the sides which make it a little less neat to carry around and store away, although all the connections seem secure. Mounting the assembly into a 3D printed enclosure could help neaten things up.
LCD interference remains an issue, but by using an external antenna with a few meters of good quality shielded coax the problem can be managed.
Overall we think the product is an excellent starting point for any RTL-SDR Pi 4 project that requires a screen.
Disclaimer: We do not receive any compensation for this review apart from a free TS7 Pro.
Over on YouTube the Society of Amateur Radio Astronomers have recently uploaded talks from their SARA 2022 online conference. Two of the talks we've seen focus on describing results produced by small and cheap WiFi Grid RTL-SDR radio telescopes.
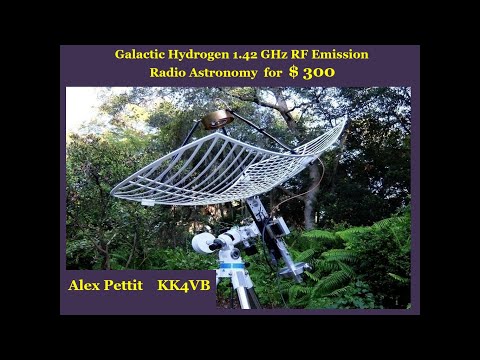
Back in early 2020 we first published an article about how it is possible to use get into amateur radio astronomy cheaply using off the shelf WiFi grid dishes, combined with a 1420 MHz LNA + filter, an RTL-SDR and the SDR# software with IF average plugin to measure the galactic hydrogen line.
In the SARA conference we've seen two talks expanding on the use of WiFi grids for radio astronomy. In the first talk Alex Pettit discusses how he's used a WiFi grid attached to an equatorial telescope mount, and a custom modified feed in his setup. In his talk he explains how to use the IF average plugin, and how he uses a MATLAB script to process and plot the saved data.
Alex Pettit: Galactic Hydrogen 1.42 GHz RF Emission Radio Astronomy for $300
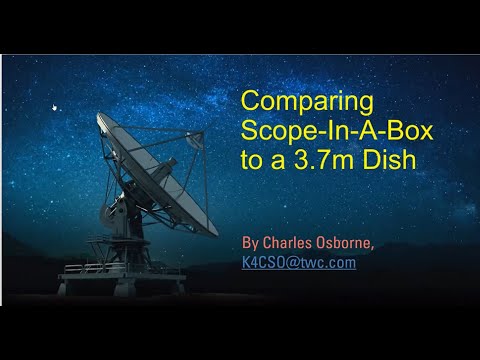
In the second talk Charles Osborne describes his "Scope-In-A-Box" which consists of the WiFi Grid, LNA, Filter and RTL-SDR combination and compare the setup versus the same hardware used on a larger 3.7m dish.
Charles Osborne: Comparing Scope-in-A-Box to a 3.7m Dish
If you were interested in those talks, you might also want to check out the other talks from the conference, many of which also involve the use of software defined radios in the receive chain for various amateur radio astronomy experiments.